Detection Monitoring Home Lab
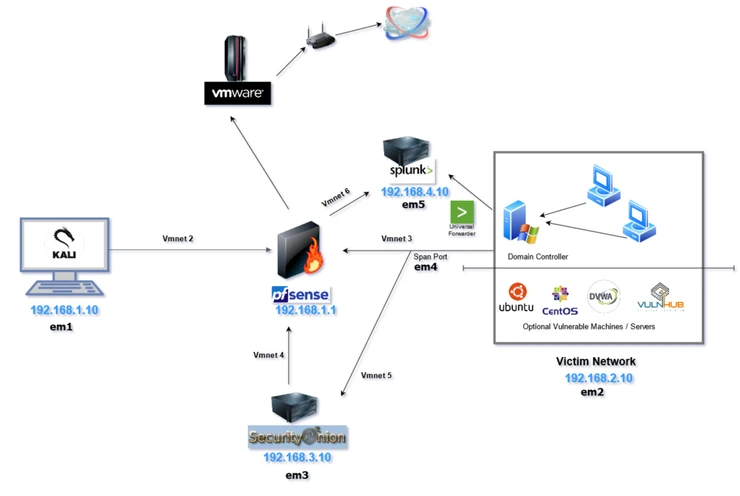
Here I'm going to show how to create your own small scale enterprise environment for testing tabletop exercises and configure essential cybersecurity tools locally. Here is a quick run down of our entire configuration.
ENTERPRISE NETWORK DESIGN & TOPOLOGY
Downloading & Installing VMware Workstation Pro 17
For personal use, VMware just recently made it free to install Workstation Pro along with Fusion Pro. Since I'm using Windows and Linux however, I will use Workstation Pro 17.
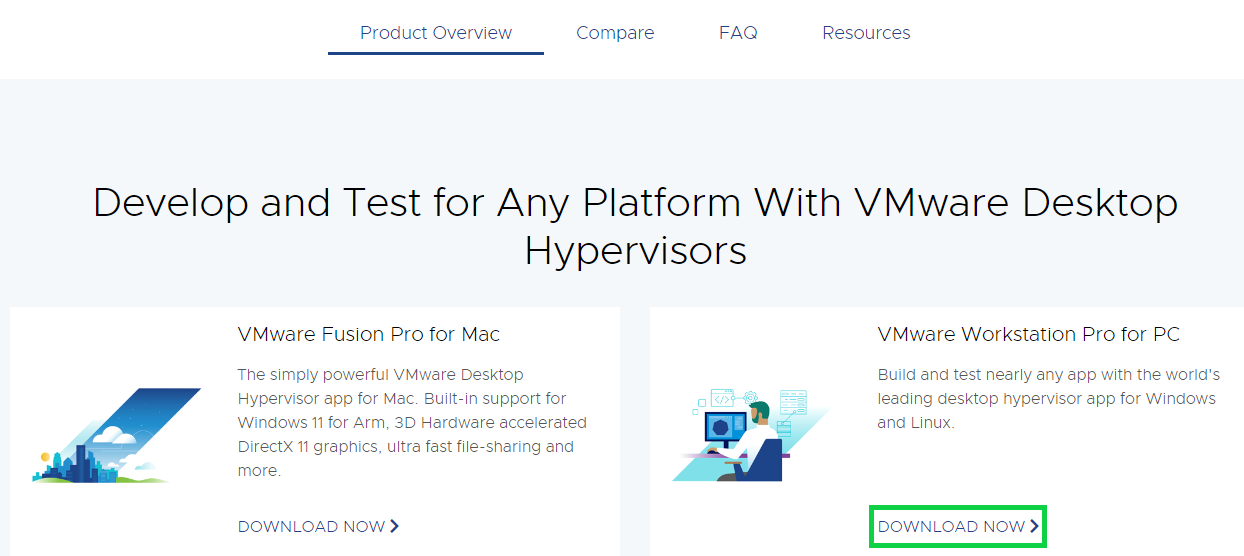
You'll need to make a Broadcom account in order to download VMware.
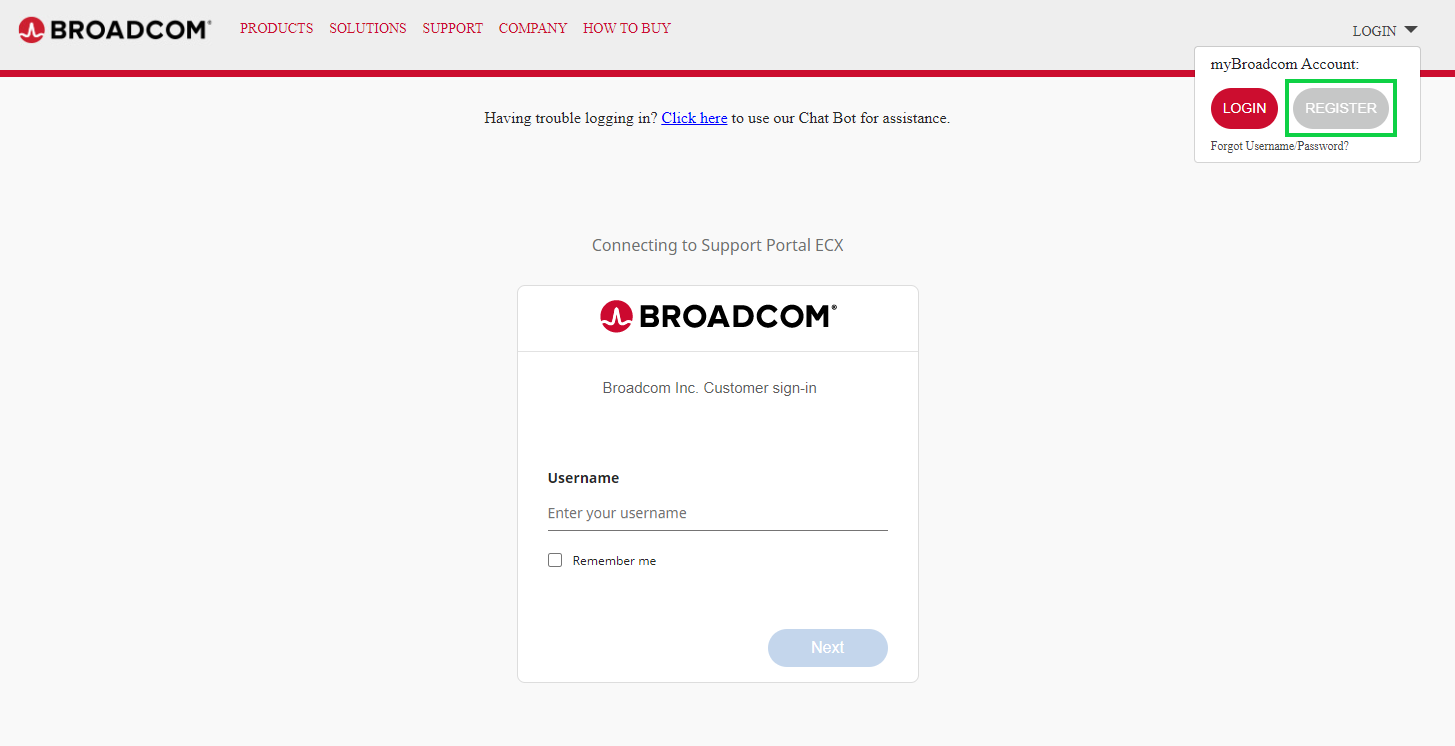
Keep in mind that this current method of obtaining this is current as of June 2024, so bear that in mind when installing this on your end if you're strictly going for a personal license.

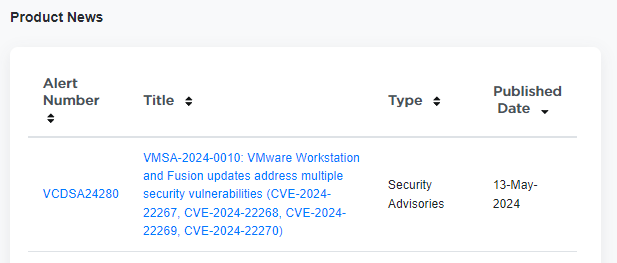

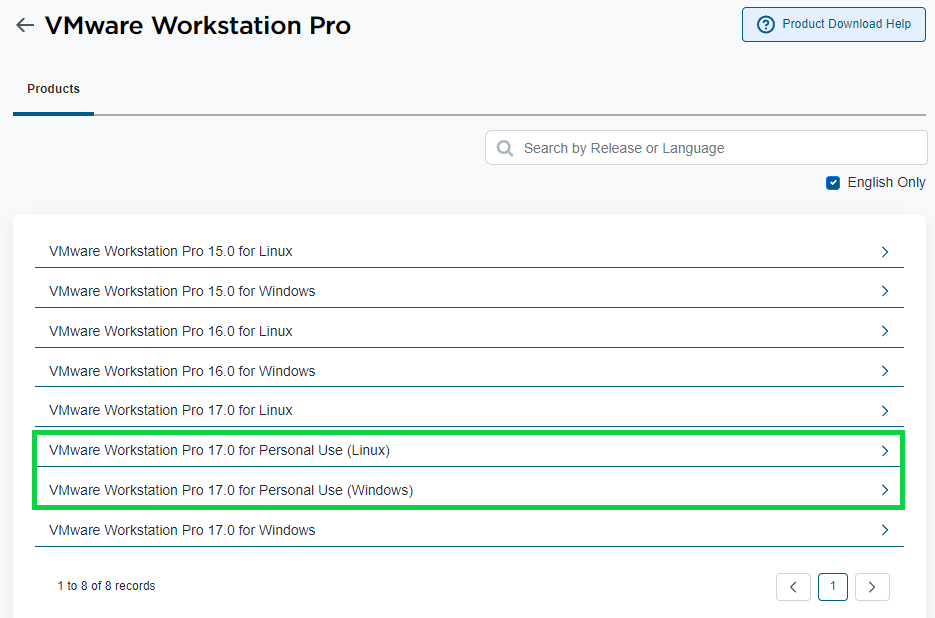
I recommend using the latest version. Once you agree to their conditions, you should be good to download.
Once you open the file you downloaded, you will be prompted to enter a license for commercial use, but just select the personal use option.
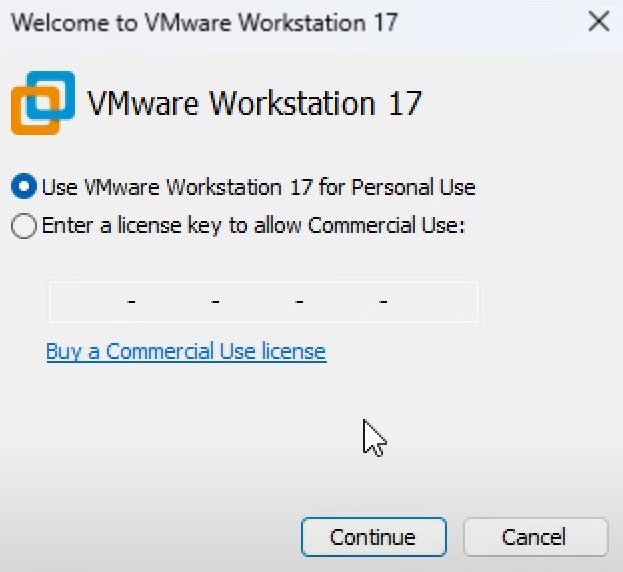
You can also use Virtualbox or Hyper-V but since VMware seems to be the best virtualization application on the market at the moment, I'm going to stick with that using that.
Configuring our pfsense VM
We will be configuring pfsense as our firewall to segment our private homelab network and will only be accessible from our Kali Linux VM.
You can download the pfsense ISO file from here.
Select "Create a New Virtual Machine" on VMware Workstation Homescreen. Make sure "Typical (recommended)" is selected and click Next.
Select "Browse" and navigate to the folder where your pfsense file is located.
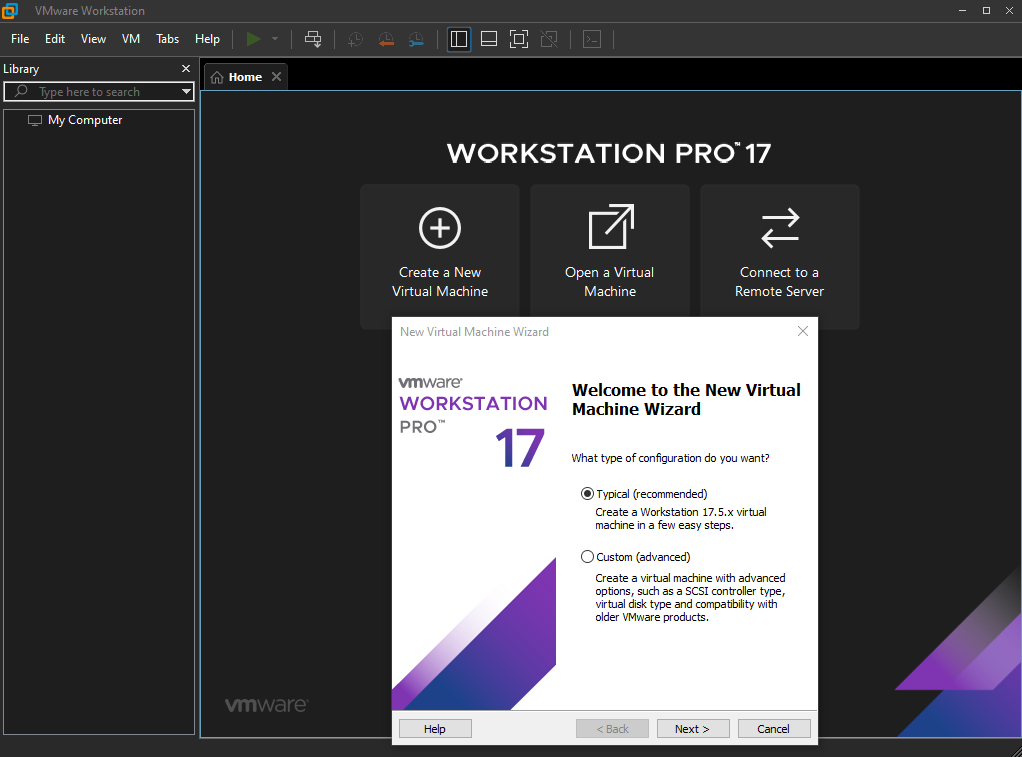
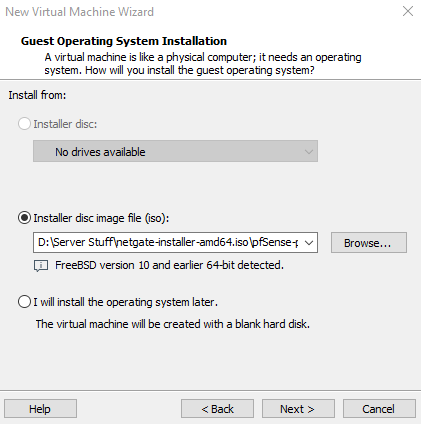
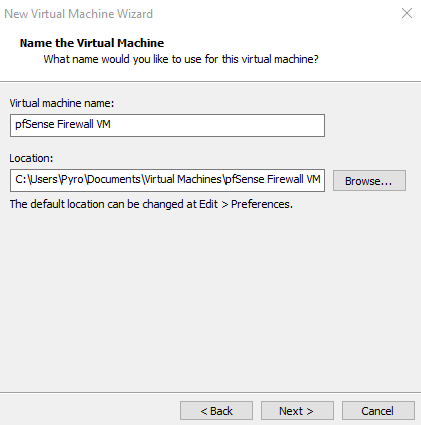
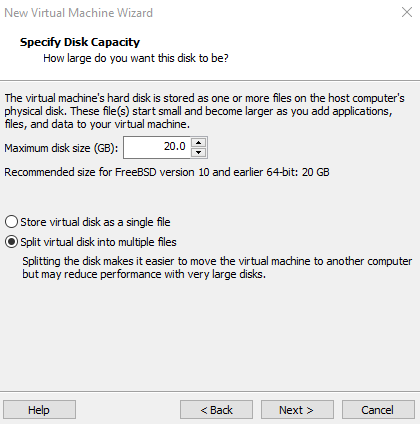
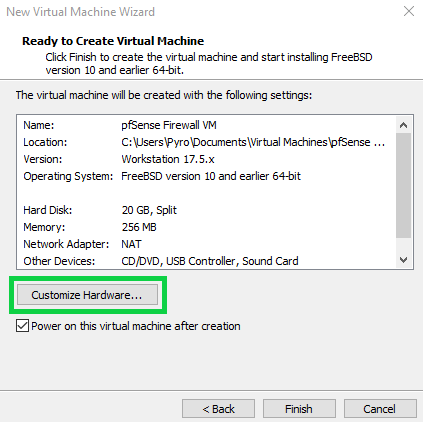
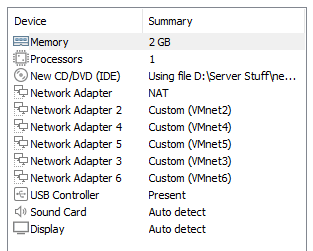
I recommend going with at least 20 gigabytes for storage and 2 gigabytes for the RAM with the VM.
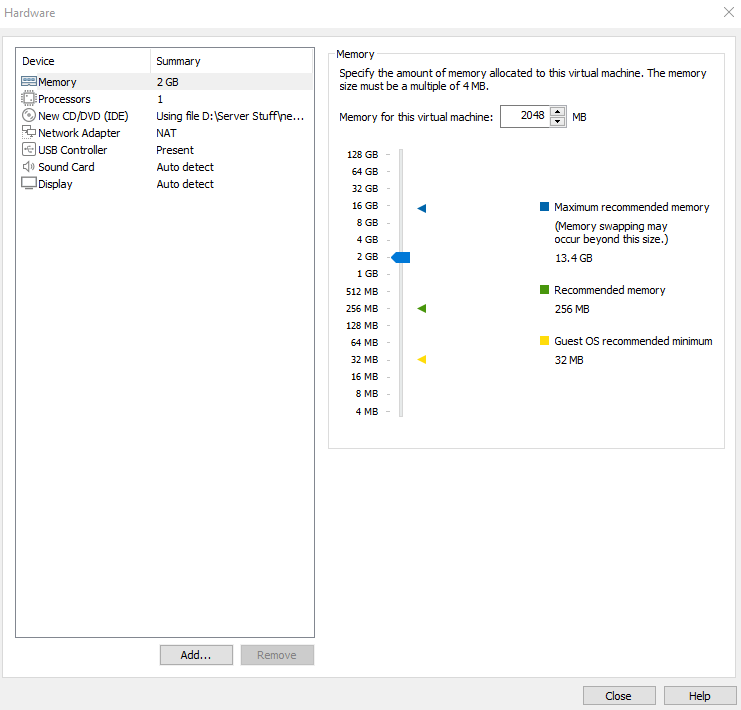
Add five Network Adapters and assign them Vmnet2 through Vmnet6 as shown.
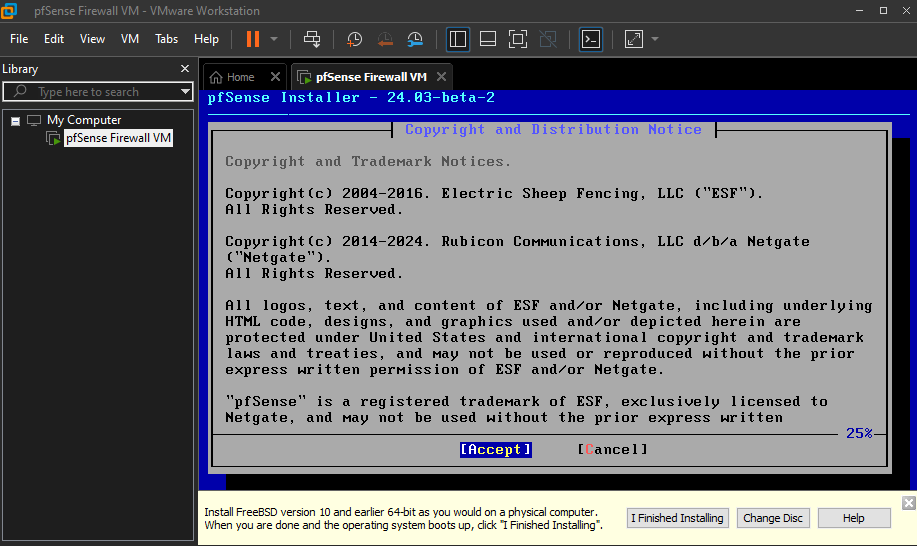
Now since we're using the community edition, we'll pass the validation screen by selecting "Install CE". However, if you are using an enterprise license, you'll bypass this step.
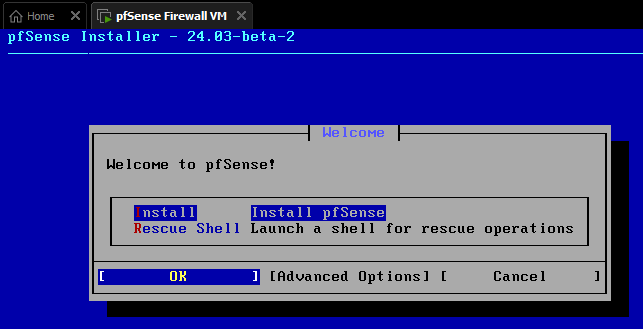
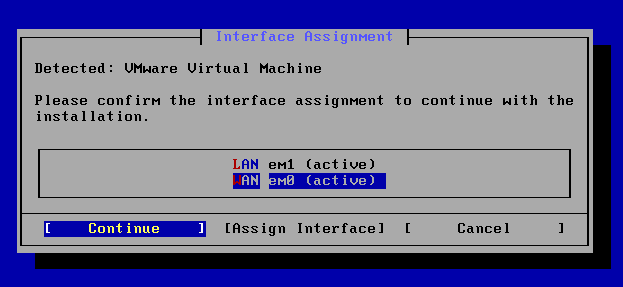
You'll want to go ahead and assign network adapters em0 and em1 to WAN and LAN respectively
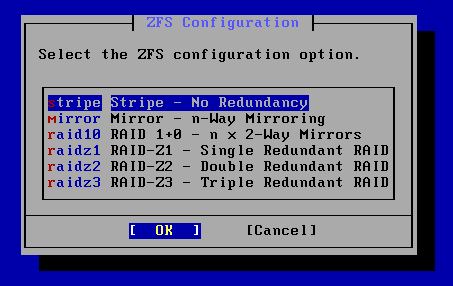
You'll need to select a file system type and partition scheme, with the default being ZFS. Now just like with regular RAID installs, there are advantages and disadvantages to whichever ones we pick. Since this is a small project and I only am using one disk, I'm going to use RAID 0 (Striping) for some redundancy at some cost to performance. Here is a good article that goes over the differents RAID types so that you can pick the best solution for your needs.
After you finish your configuration, you'll need to reboot your VM when prompted. You should then end up with this screen.
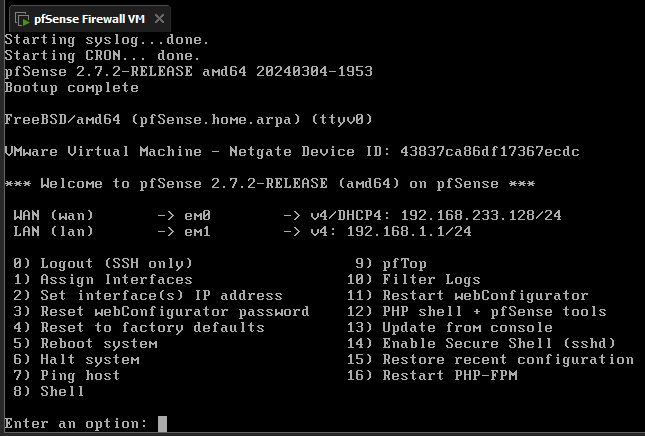
We'll go ahead and assign the network interfaces to our adapters that we set up earlier by selecting option 1.
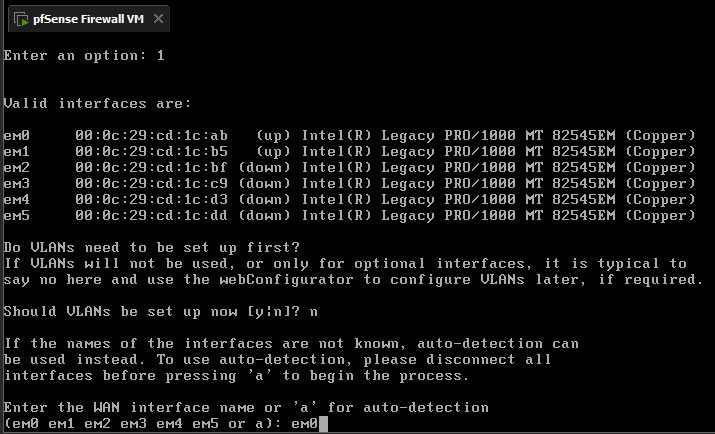
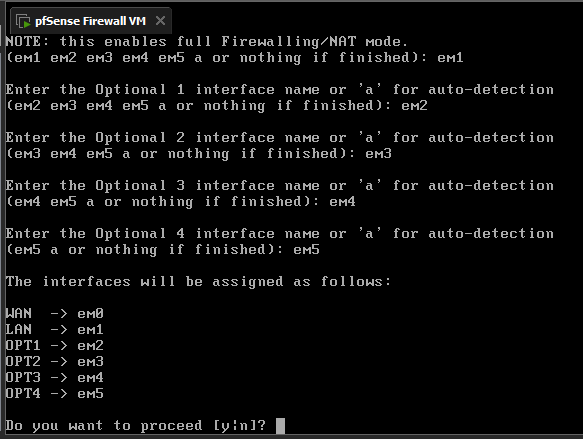
Next we'll enter option 2 to set our LAN interface with our IP address. We'll start with The IP address 192.168.1.1 for access the pfsense WebGUI via the Kali Machine. Use the configuration for guidence on what to enter for the network settings.
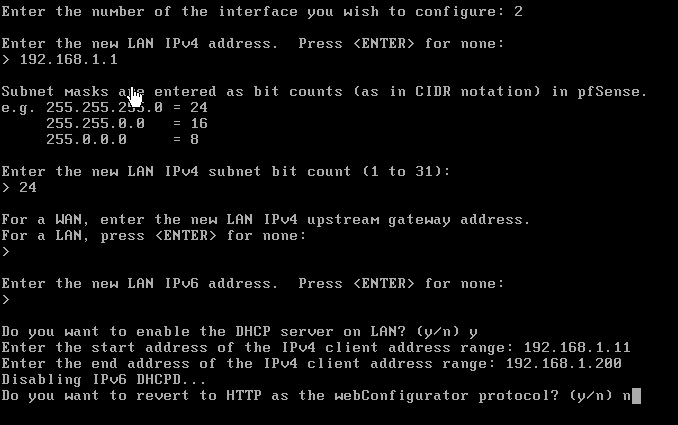
Use the configuration below for the OPT1 interface.
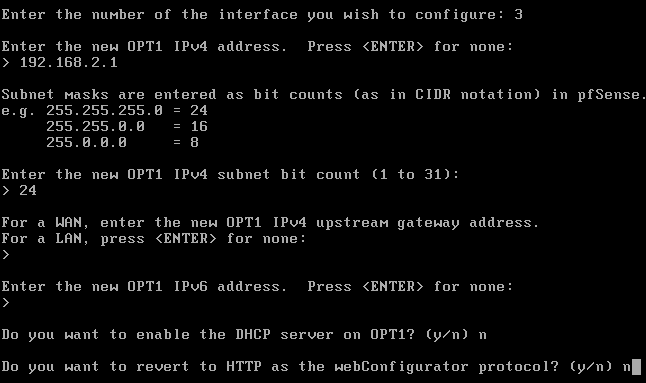
Use the configuration below for the OPT2 interface.
Leave the OPT3 interface without an IP address since it's going to have the span port with traffic that Security Onion will be monitoring.
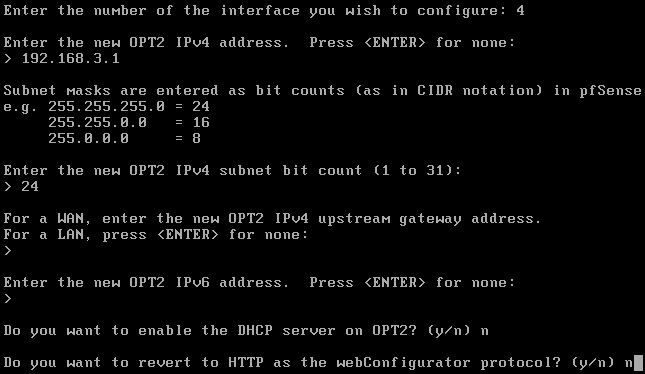
Use the configuration below for the OPT4 interface.
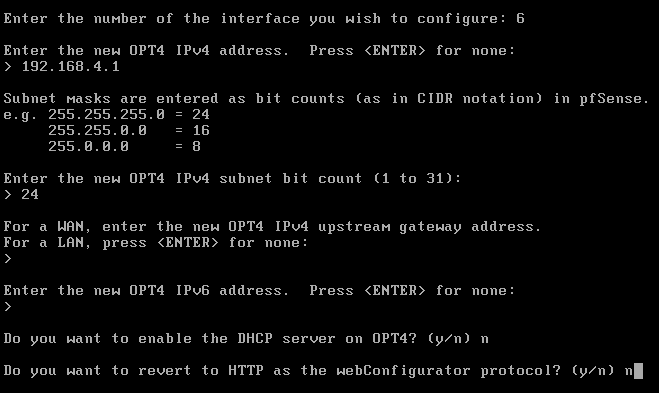
This ends the configuration of the pfsense VM. The rest of the configuration will be done via the kali machine through the WebConfigurator.
Configuring our Security Onion VM
You'll want to download the Security Onion ISO file from here. The installation VMWare part will be very similar to what we did with pfsense VM.
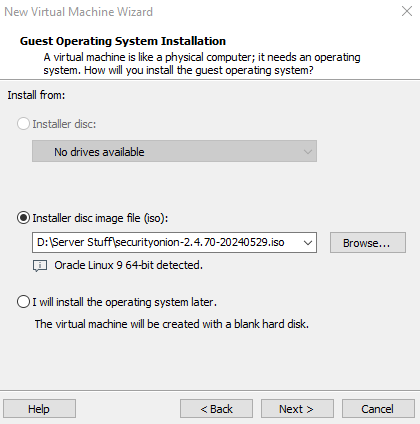
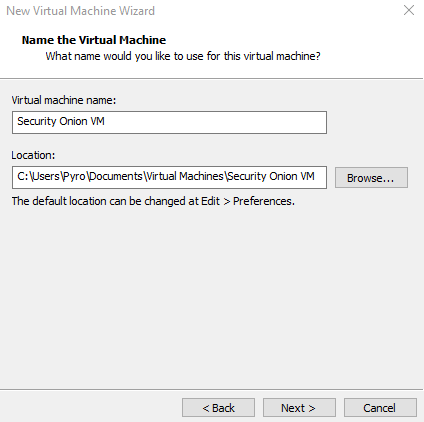
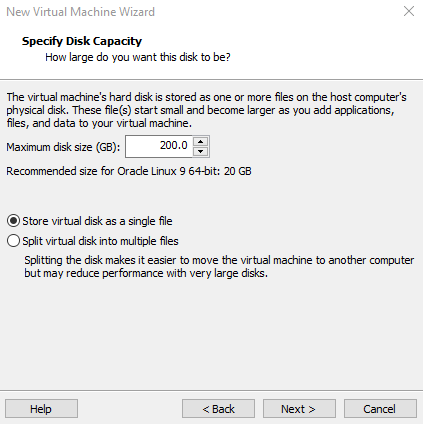
Note: Security Onion will use a lot resource wise if fully utilized (minimum of 200 gigabytes storage, 4-32 gigabytes of RAM) so plan accordingly if you decide to use it to it's full potential.
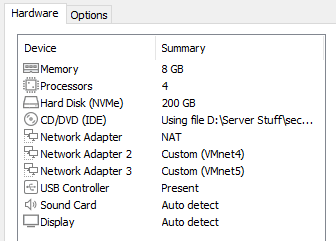
Add two Network Adapters and assign them Vmnet4 and Vmnet5 as shown.
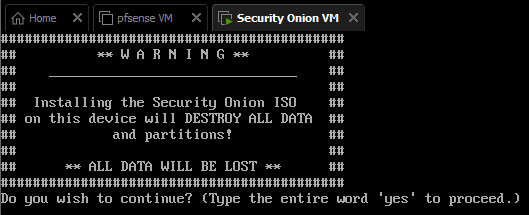
Once that is all done and you boot up your VM, you should see an install prompt. Once you continue past it, you should see this screen here with a final installation prompt. Proceed forward and set up an administrator username and password.
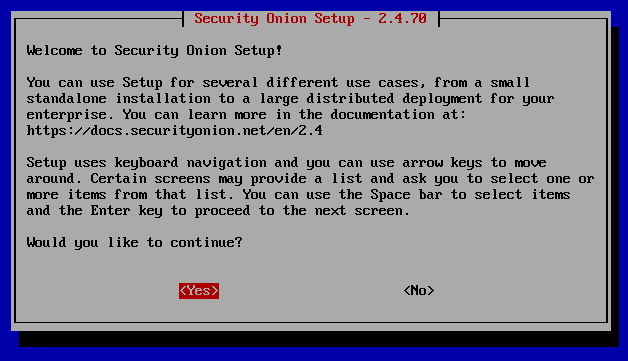

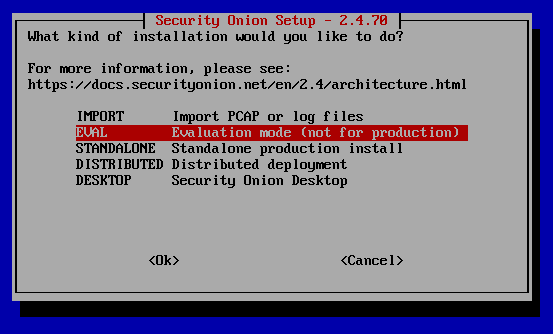
You'll want to pick the "EVAL" option.
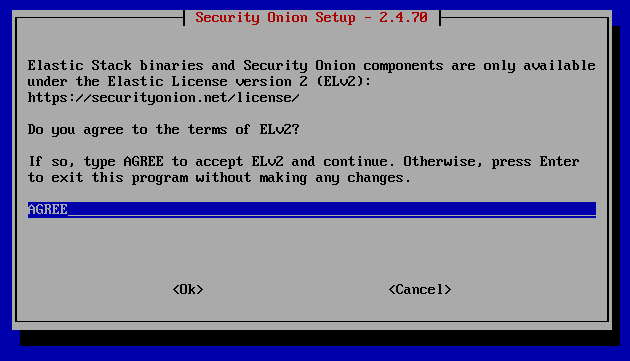
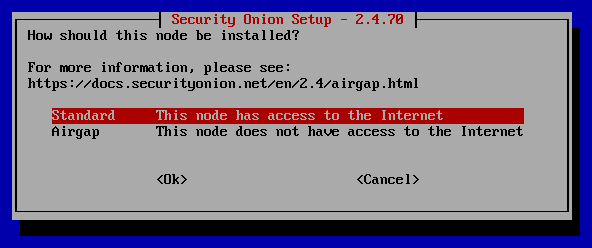

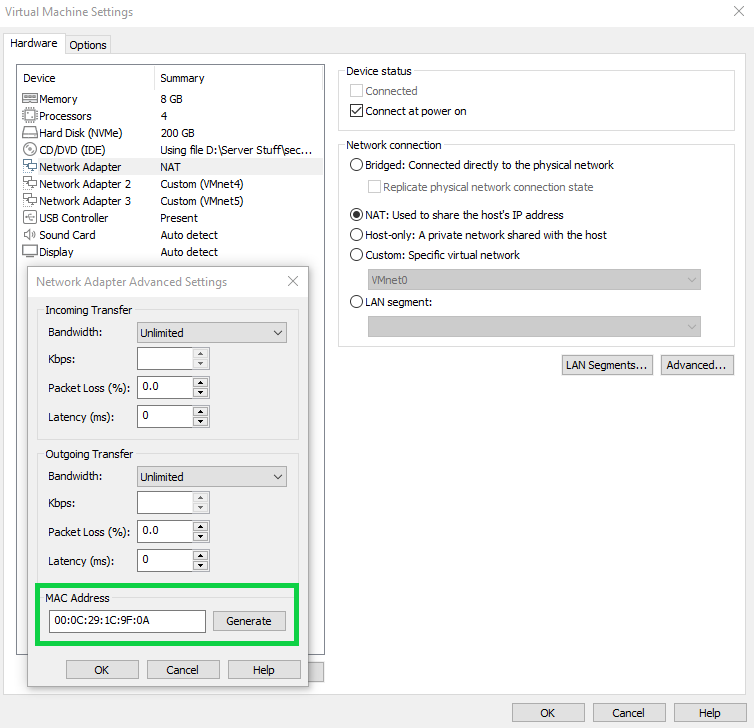
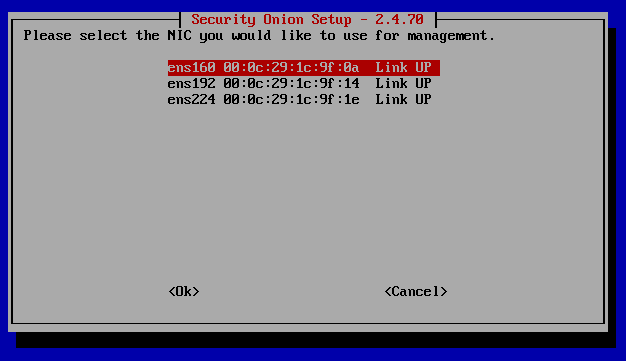
So this part is important. When we set up our VM initially for this, we had our original network adapter as well as the two custom ones we set up (VMnet4 and VMnet5). If we look at our original network adapter settings, we'll see that it's set to NAT by default. If you want to be able to access your Security Onion VM from other devices in the network, then choose Bridged, otherwise choose NAT. In this tutorial, this will be our management interface. In order to tell which one our options is which network adapter, you'll want to match the MAC address assigned, which you can find in the "Advanced" settings under the Virtual Machine Settings.
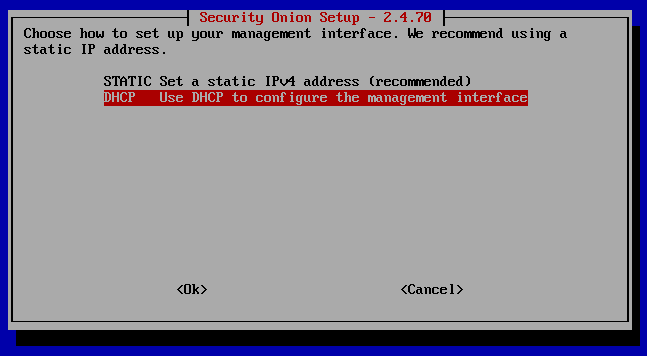
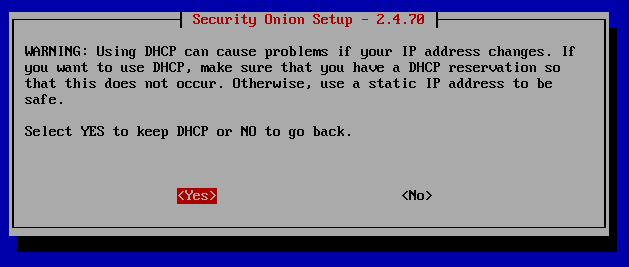
I'm going to go ahead and use DHCP here since this is a lab environment and we can just screenshot the given IP address and subnet after the install here. Much of Security Onion is secured by internally generated certificates that are tied to specific IP addresses and hostnames. Changing these after they are set can lead to configuation errors and communication failures between components. For that reason, it's usually recommended to use Static instead. If you do decide to use DHCP, make sure that you have an IP address reservation set up in your DHCP server so that this instance is not issued a different IP address in the future.
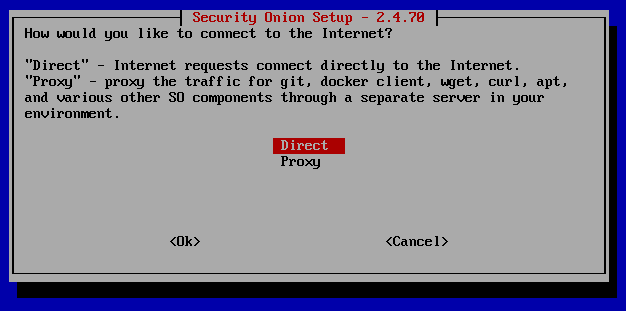
We don't want to proxy since we will be using Security Onion to directly make requests to the internet, so select "Direct".

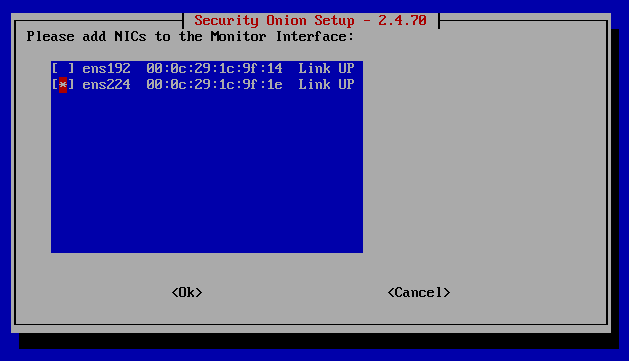
You'll want to use the last NIC option (VMnet5) here since it'll be used as our span port as shown in our network topology. Press the spacebar to select it. Once that is done, set up your email account you'll want to manage the administrator account with on Security Onion.
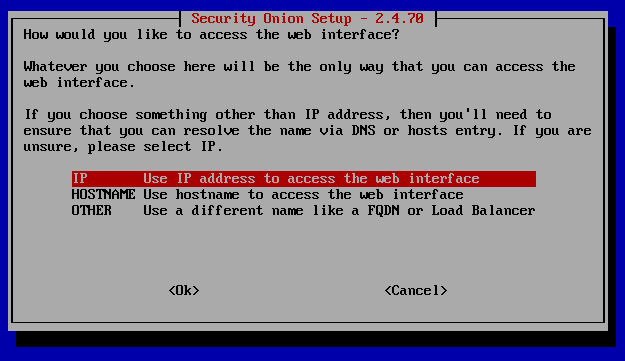

Here I am going to enable my entire subnet of my VMware network so that no matter if I change any configurations within it, as long as I remain in that IP range with my configurations, I'll be able to access Security Onion. This is useful in the inital configuration but we will want to limit down our IP address access to improve our network security. We'll worry about that towards the end of the project.

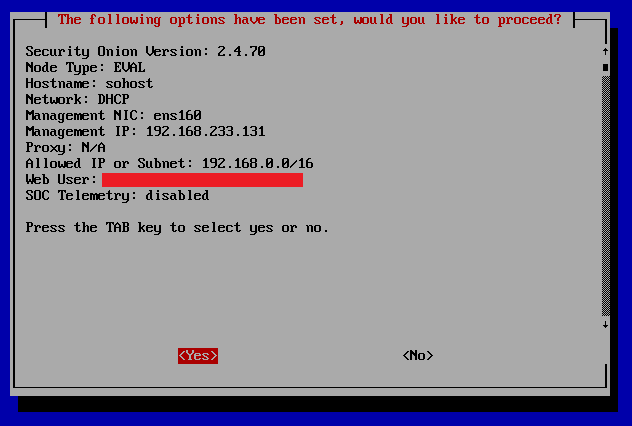
Note the web user URL and save that link somewhere so that you know which IP to put into for web access (in this case, it's https://192.168.233.131)
After installing Security Onion, having access to the web interface will be done from an external Ubuntu VM simulating a SOC/Security Analyst accessing a SIEM or any other tool from their device.
Configuring our Ubuntu VM
We're going to be using all the default settings for Ubuntu with our installation. Keep in mind that you can use any Linux distro you want for this VM, but we're just going to go with Ubuntu.
Download the most recent version of Ubuntu from here.
We'll go with another typical VM install and use the default settings presented to us with this install.
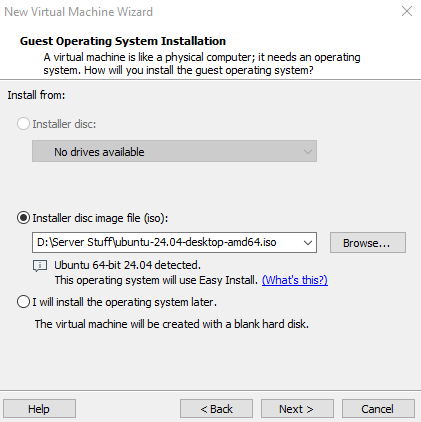
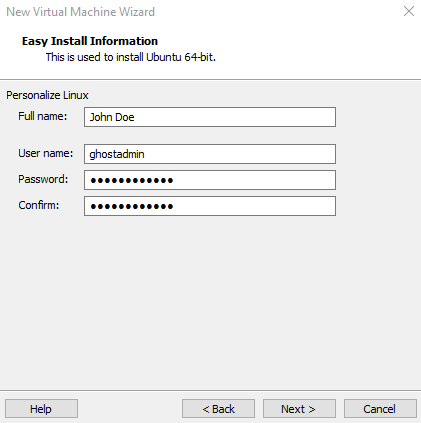
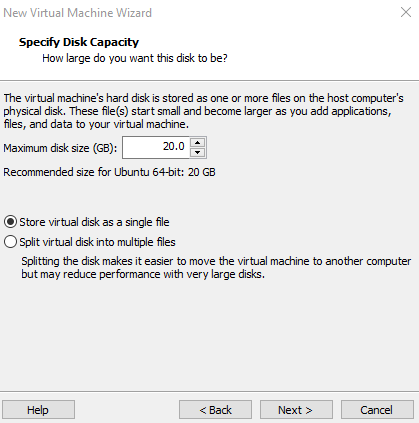
We'll want to switch the network adapter here from NAT to host-only to not let the VMware guest VM connect to the host internet during the installation. This will help avoid updates being downloaded automatically for Ubuntu since this can drastically slow down our installation.
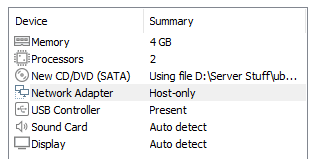
Once you're done with that installation, we'll want to enable the internet since we disabled it prior to our installation. Simply go into the VM settings on the Ubuntu VM and switch it back to NAT from Host-only.
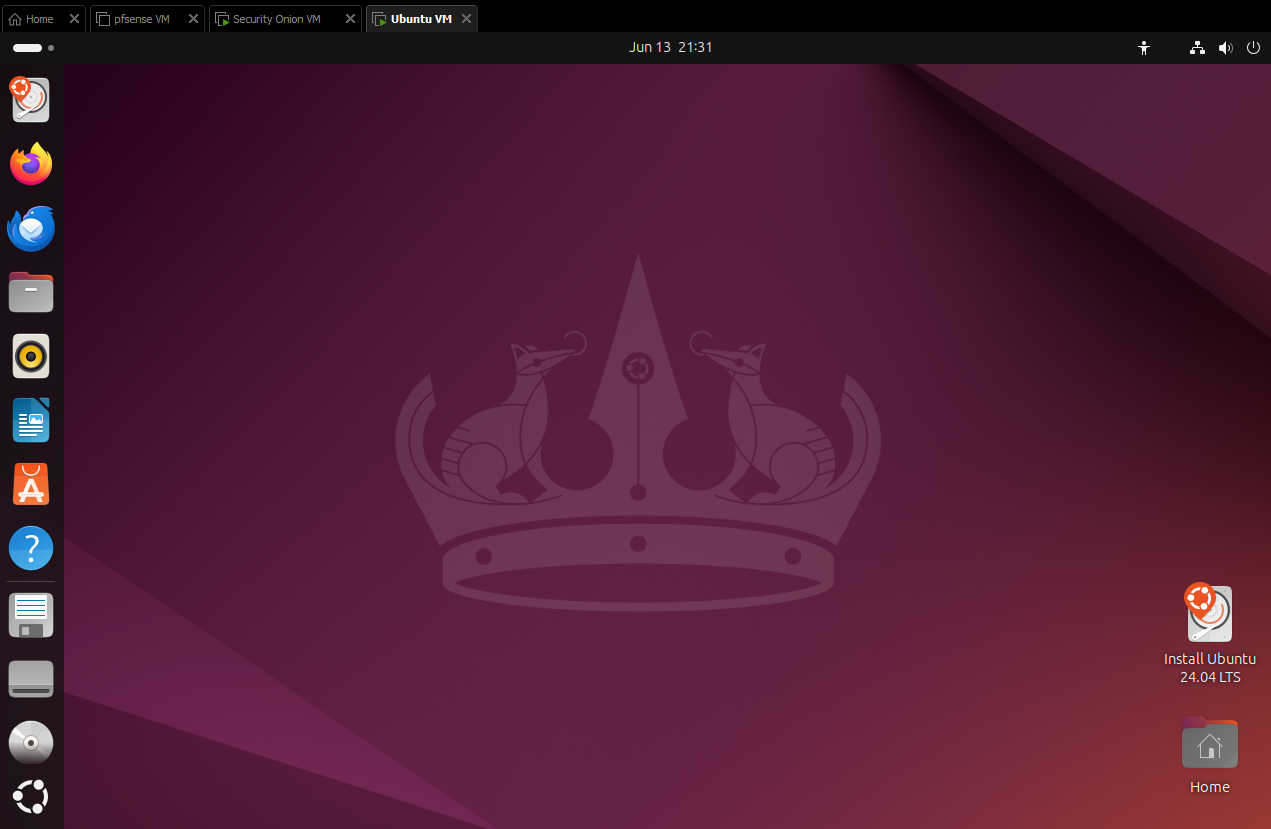
you'll want to run ifconfig to pull it's IP address so we can add that to the Security Onion firewall to allow web access from your Ubuntu VM.

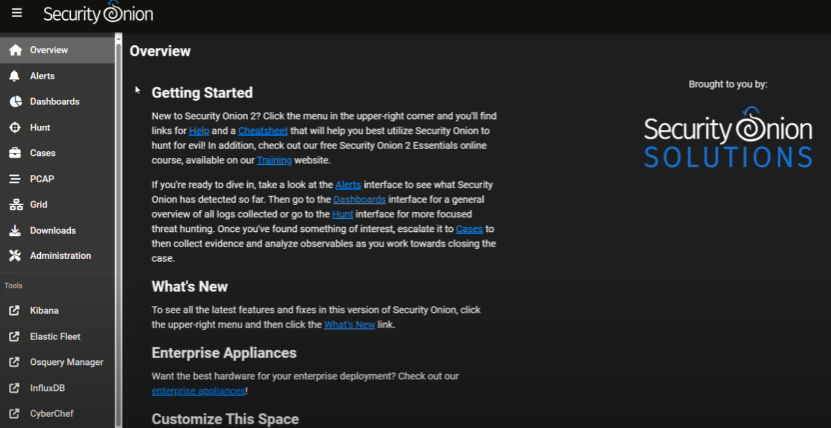
Let's take a look at our Security Onion portal. You'll want to type in your management URL (in our case, https://192.168.233.131). For now I just want to show you it's UI; we'll worry about setting up our firewall configuration later in it.
Configuring our Kali Linux VM
Our Kali Linux VM will be or attack machine to test offensive actions against our domian controller as well as other machines attached to it.
Download the most recent version of Kali Linux for use in VMware from here.
Since you're downloading the VM file, all you'll need to do is to click on the .vmx file from the Kali Folder you downloaded and it will automatically load up the default Kali image in VMware.

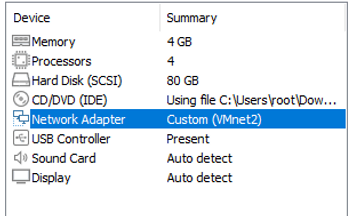
You'll want to use these settings here.
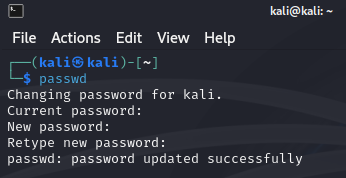
After powering on, make sure to use the command passwd to change the default password. Afterwards the Kali Linux VM is good to go.
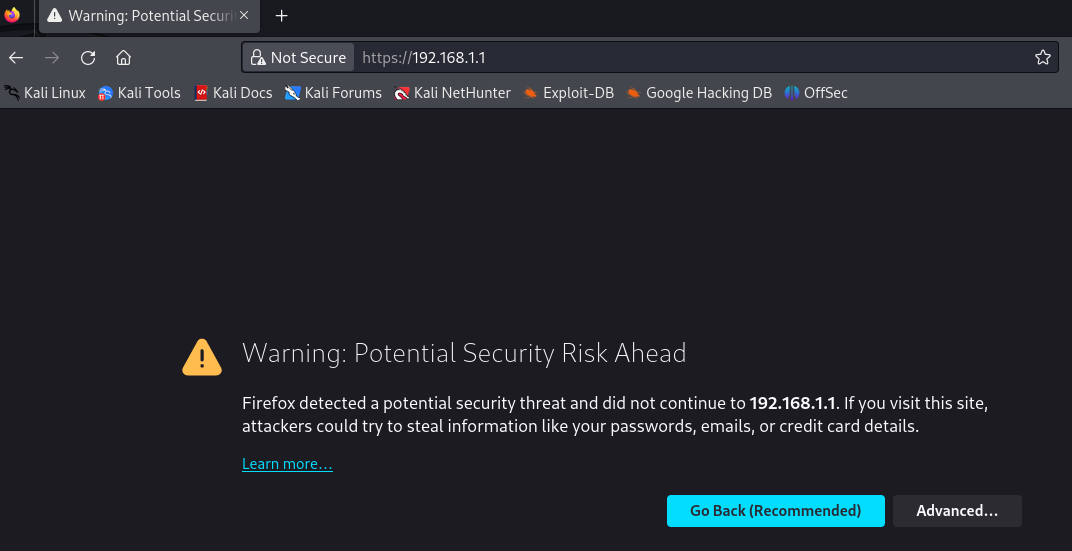
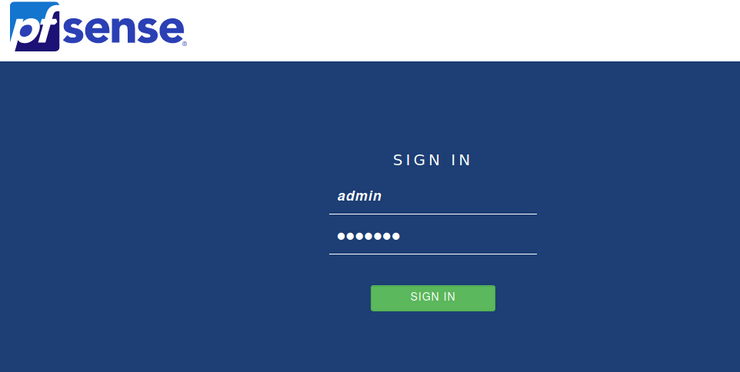
We're going to access the pfsense WebConfigurator by going to https://192.168.1.1/ so we can access the interface and firewall rules. Accept the risk on the page and continue. You'll need to put in the default credentials admin and pfsense
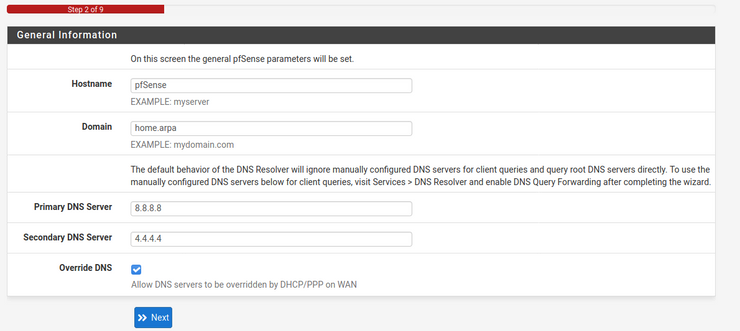
Put in 8.8.8.8 as your primary DNS server and 4.4.4.4 as your secondary DNS server.
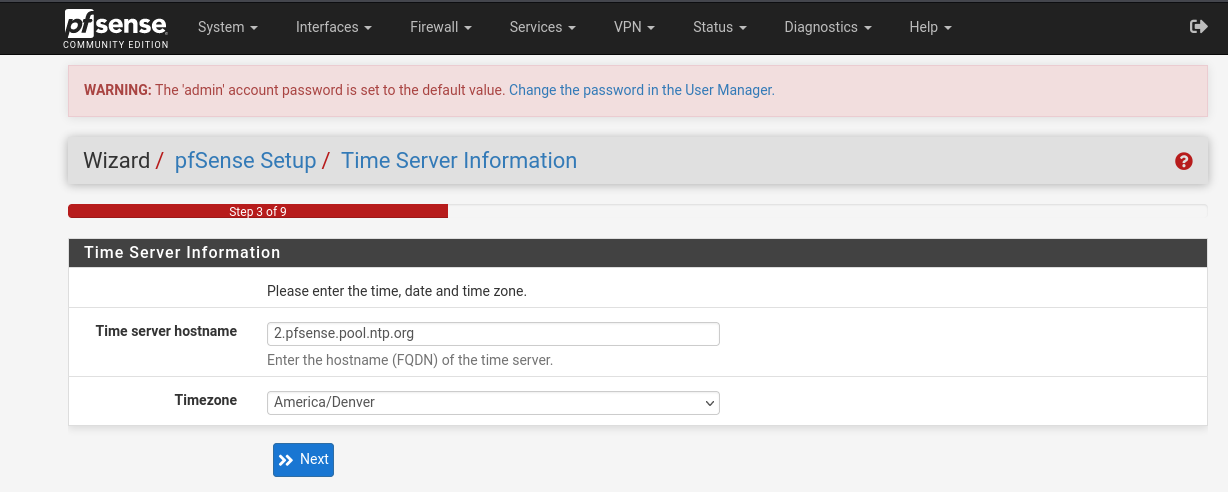
Keep the time server hostname as default for now and set your timezone.
We're going to keep all the settings default on the next page and go ahead and uncheck the bottom two boxes so that we can generate more alerts with Security Onion. Remember that in a production environment though, you'll want to keep these checked.

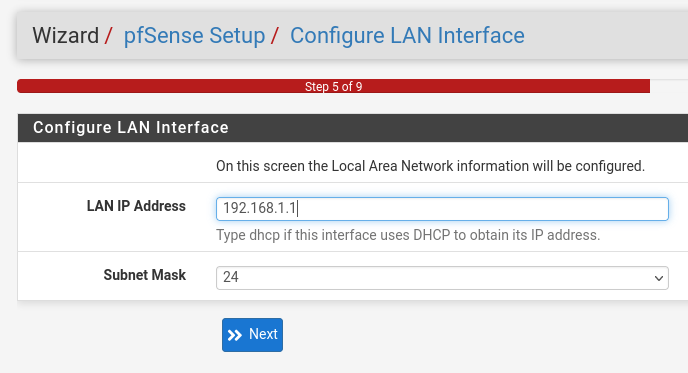
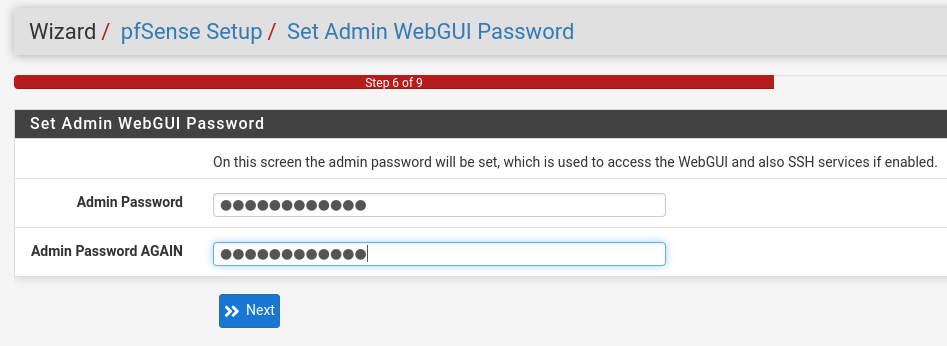
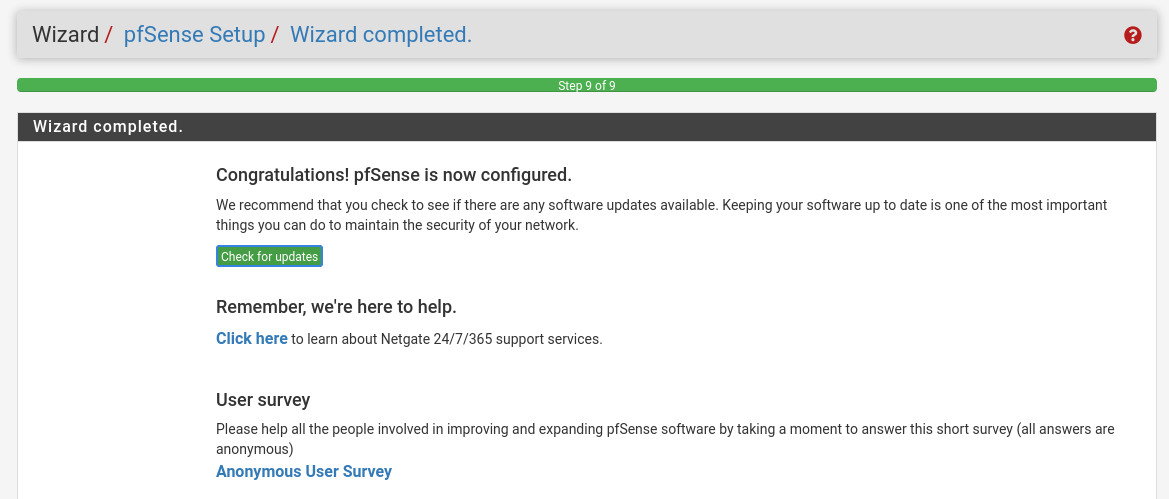
Now that the setup is complete, we'll go ahead and make changes to the interface. We'll go ahead and change it's description to Kali instead of LAN while we're at it since this is the Kali interface.
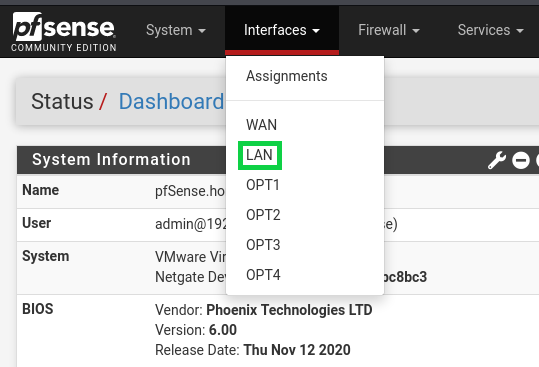
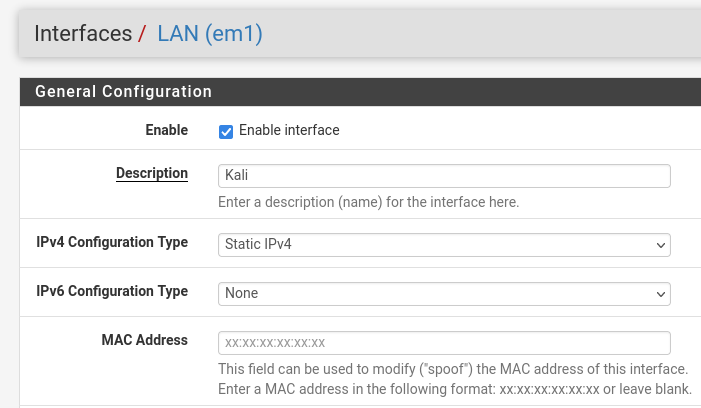
Now do the same for the rest of our interfaces so that they match the proper configuration area descriptions. Make sure to enable the interface for em4 since that one will be disabled by default.
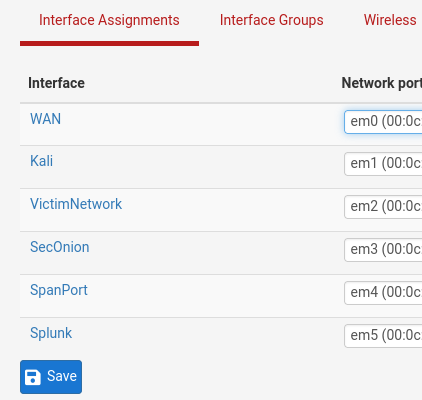
We'll now set up firewall rule that'll open up the victum network to vulnerabilities so that we can demonstrate more easily attacker scenarios. Don't use this rule in a production environment! This is just for demonstration purposes. We'll start by going into the Bridges section and adding a bridge interface.


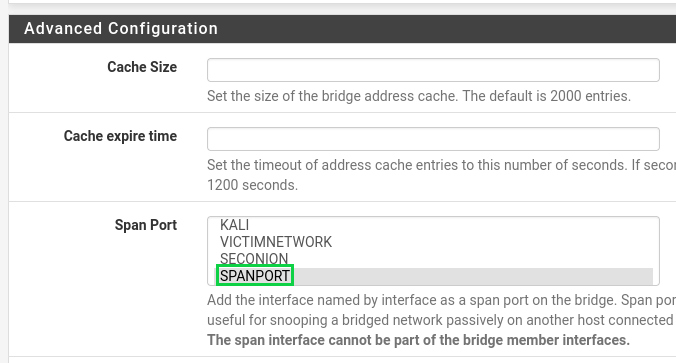
You'll want to select "Display Advanced", then under "Advanced Configuration" for Span Port, select "SPANPORT", then scroll to the bottom and click save.
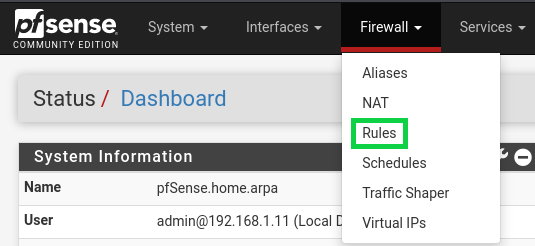
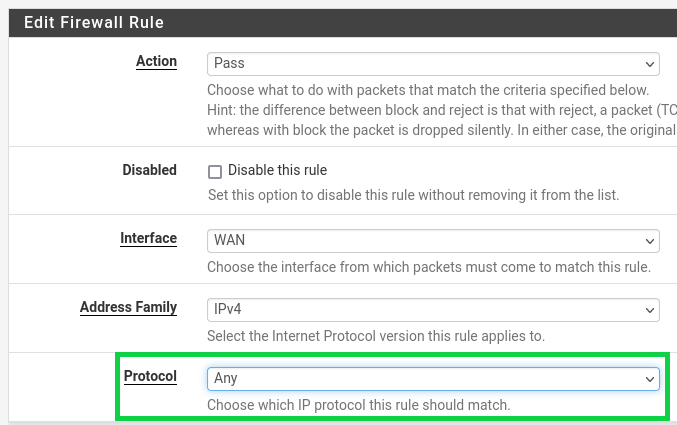
You'll then want to go into Firewall, then "Rules", then select the Add button with the arrow pointing down. Under "Edit Firewall Rule" for Protocol select "Any", then scroll down to the bottom and save your change.

Configuring Windows Server as a Domain Controller
Our goal here is to set up an Active Directory domain with a Windows 2022 Server as the Domain Controller and two Windows 11 VM's.
Download the Windows 2022 Server Evaluation Copy here.
Download the Windows 11 Evaluation Copy here.
During installation, change the network adapter to VMnet3 and uncheck "Power on this virtual machine after creation." Additionally, remove the floppy drive.
We'll start off with our Windows 2022 Server installation, which will be another "Typical" install. Leave the Windows product key area blank.
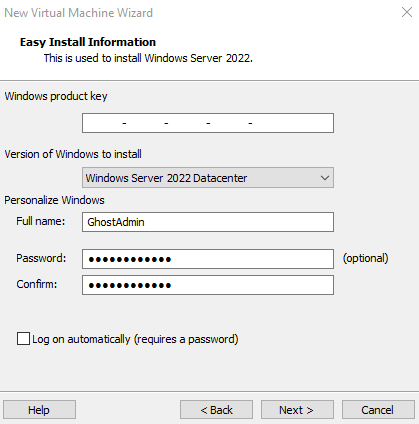
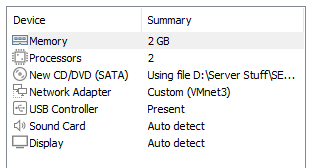
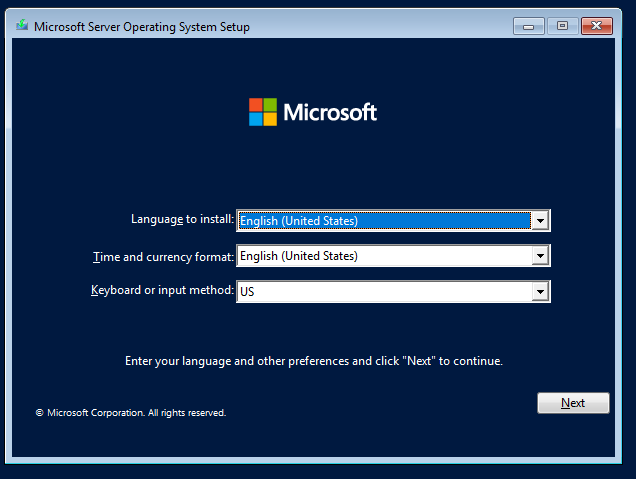
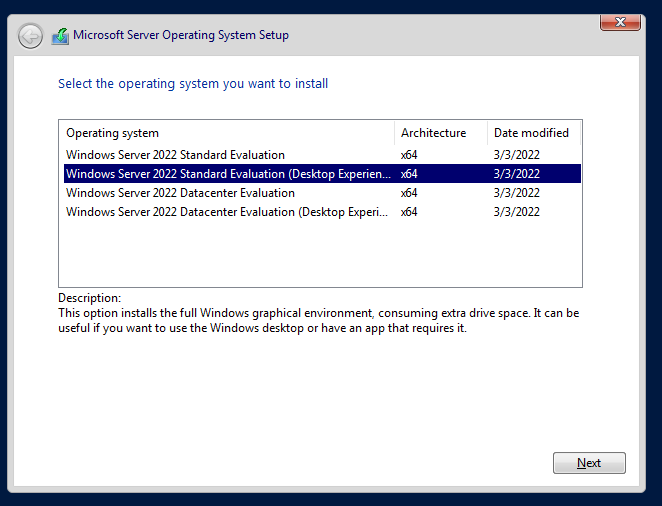
We're going to go with the full Windows GUI install for now, but if you're advanced with configuring Windows environments with PowerShell and Command Prompt or Windows Admin Center, I encourage the non-desktop installation to save disk space.
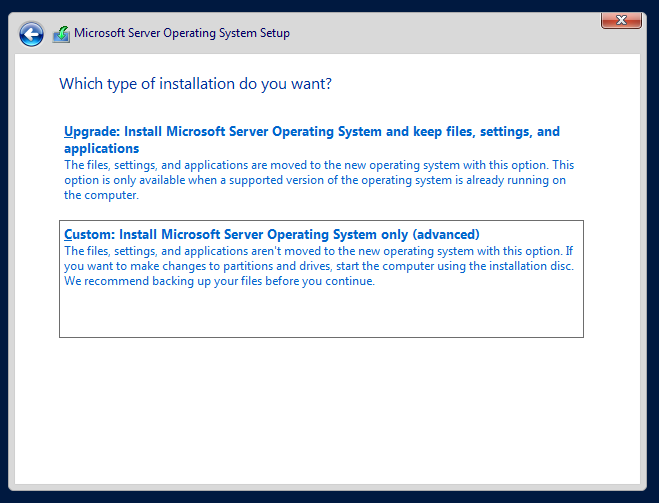
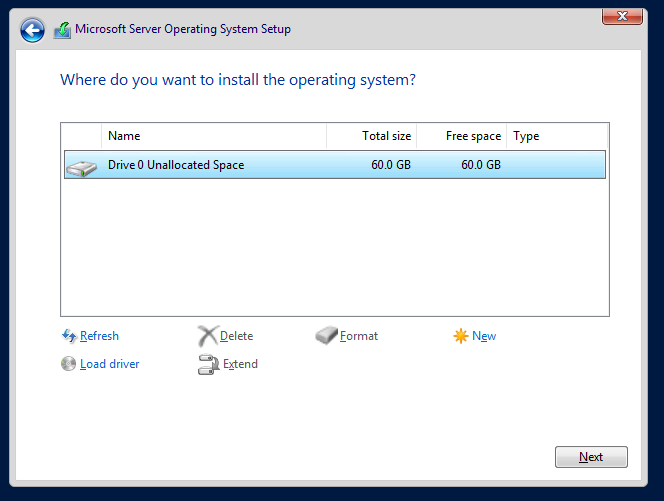
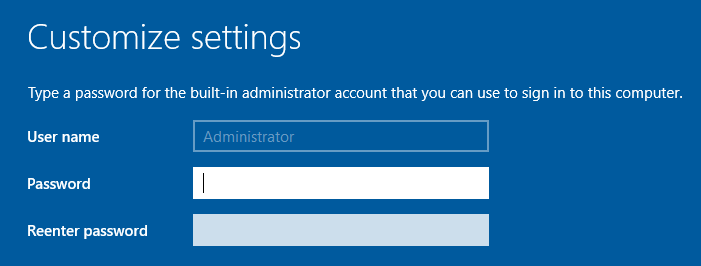
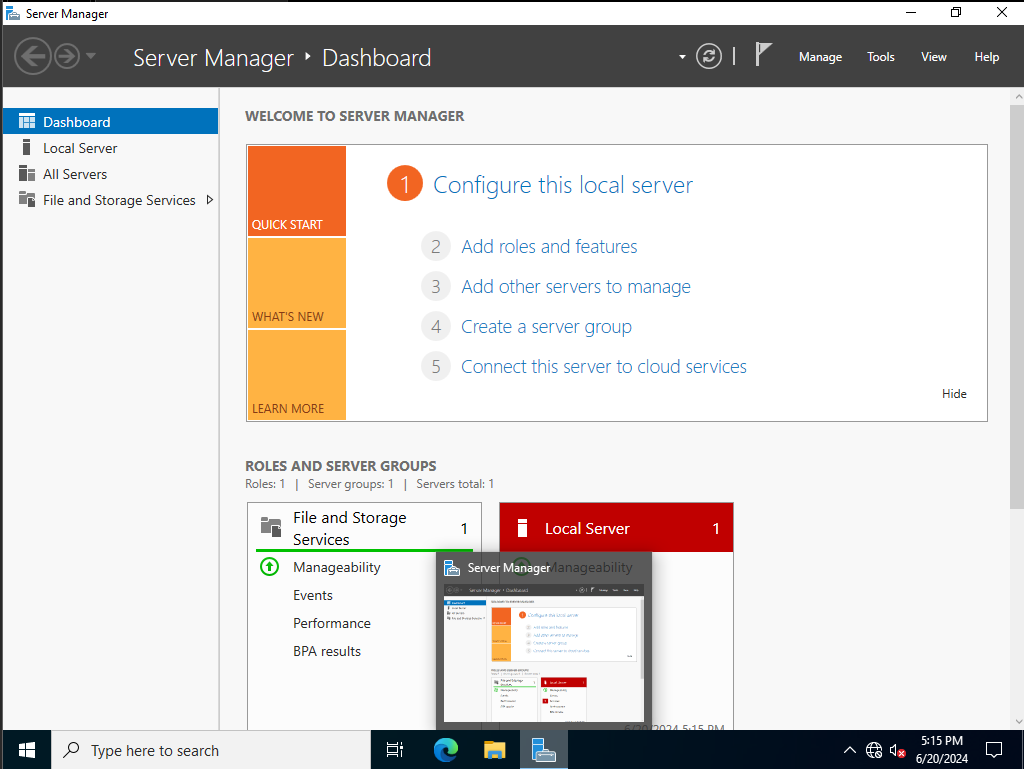
We're going to go ahead and rename the Domain Controller now. To do so, do the following:
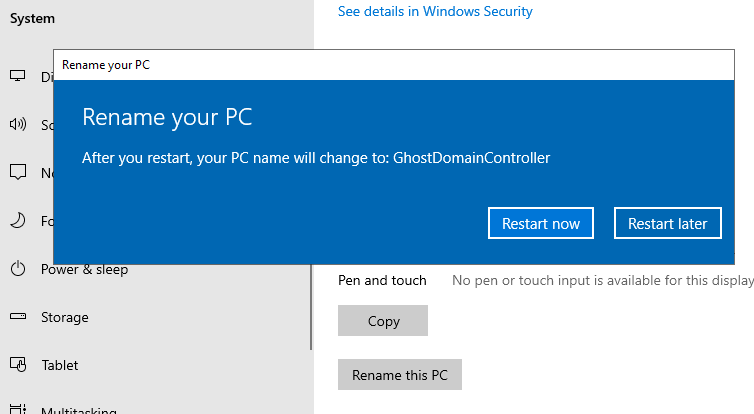
After you reboot, on the Server Manager Dashboard, Click Manage >> Add Roles and Features

You'll then click next till you get to Server Roles menu, then select "Active Directory Domain Services", then select "Add Features".
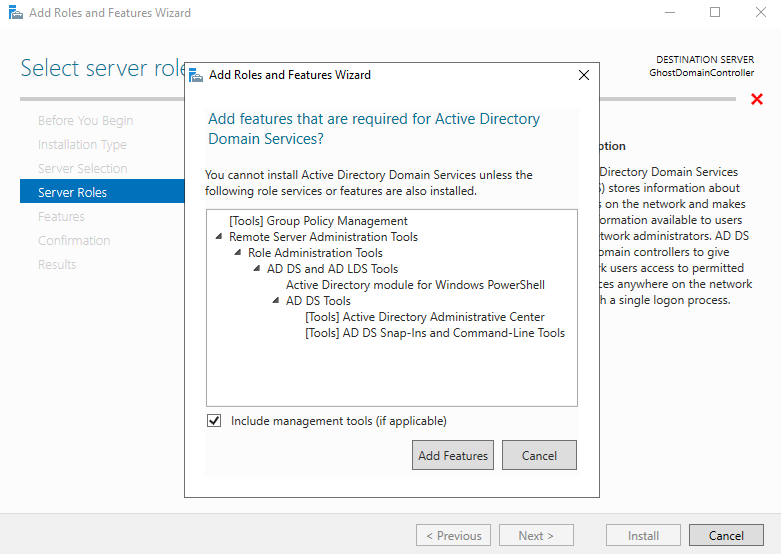
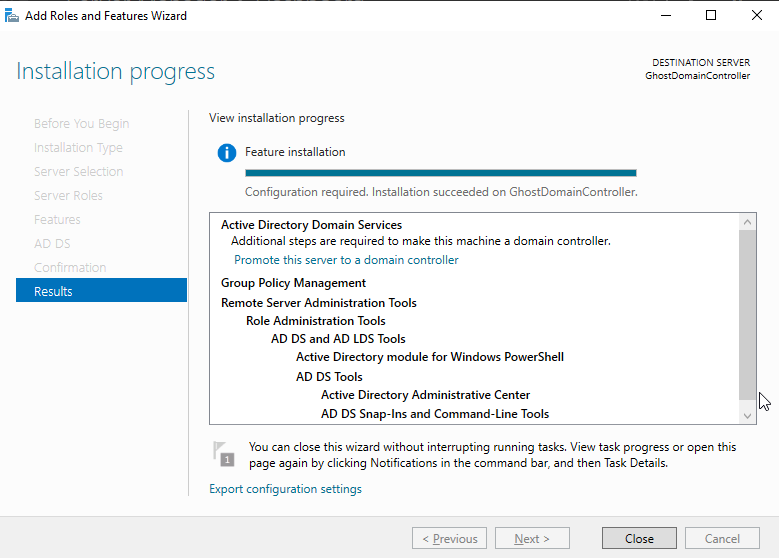
Select "Next" till you get to the confirmation menu, then select "Install". After the install, select "Close".
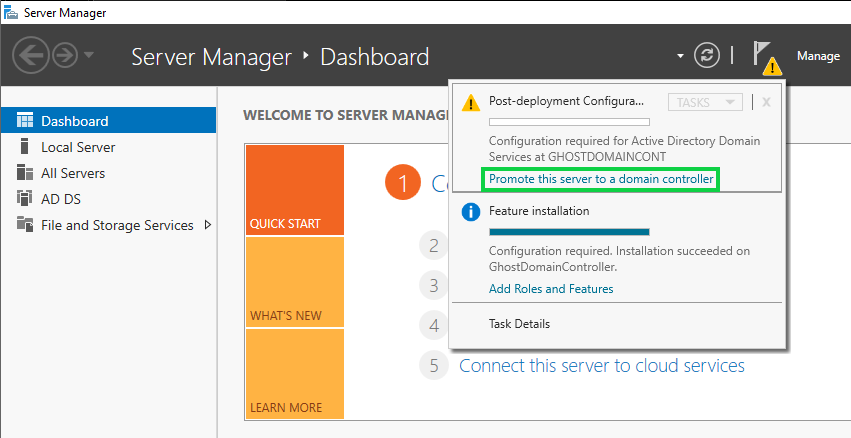
Click on the flag with the yellow caution triangle
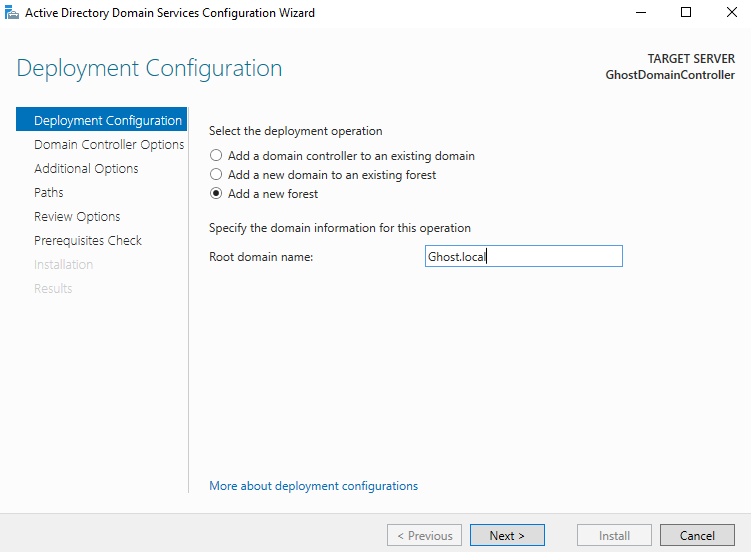
Select "Promote this server to a domain controller" then "Add a new forest", then specify a domain name (we'll go with ghost.local).
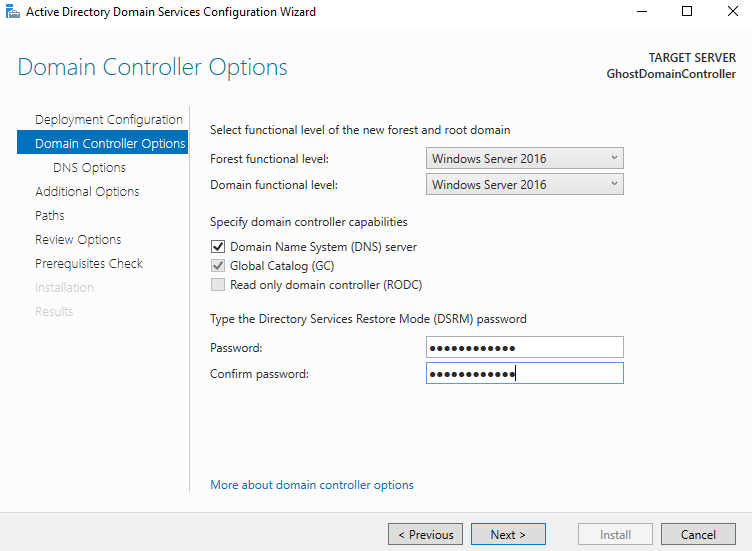
You'll then want to set a Directory Services Restore Mode (DSRM) password. Once that's done, select "Next" till you get to the Prerequisites Check Menu, then select "install" and reboot your VM.
After the reboot, log back in and select Manage >> Add Roles & Features again on the Server Manager, then select "Next" till you get to Server Roles.
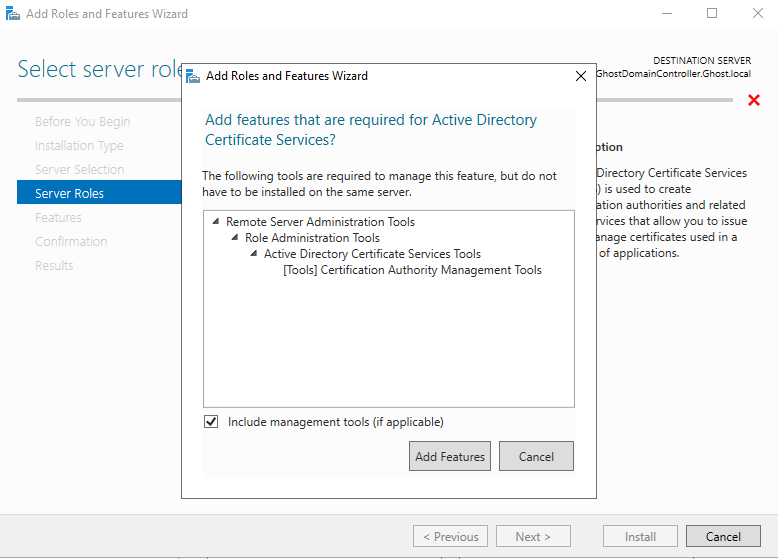
Check "Restart the destination server automatically if required", then select "Yes" and "Install". After that's all done, select close.
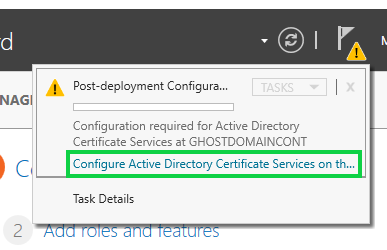
We'll now want to click on the yellow flag symbol again and select "Configure Active Directory Certificate Services on the destination server"
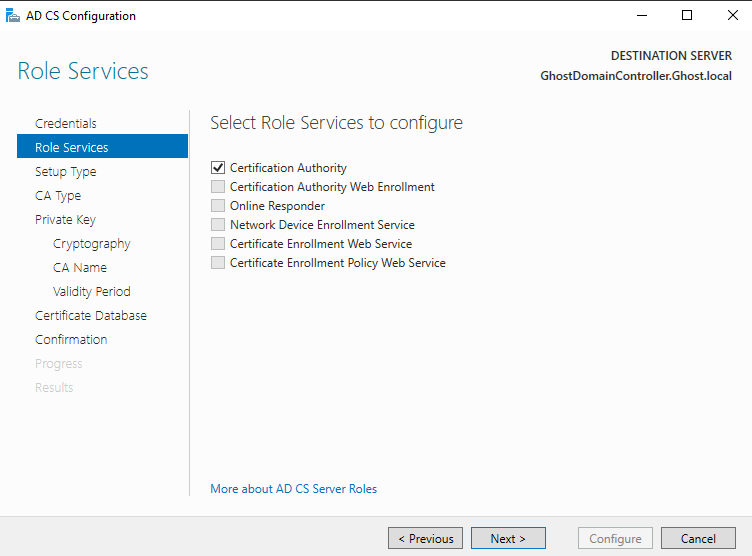
We'll then want to enter our logins for the domain controller on the Credentials menu, then proceed to Role Services and check "Certification Authority"
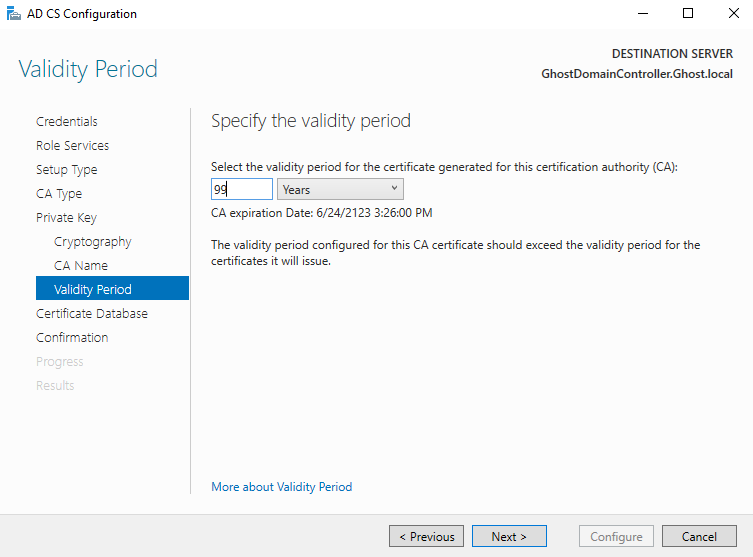
You'll then select "Next" till you get to the Cryptography menu and select a hash algorithm (I recommend SHA256). You'll then proceed to the Validity Period menu and change it to 99 years, then proceed to the confirmation menu. You'll then select configure.
You'll want to manually restart the server in order for all these settings to take effect. Once that's done, you'll then want to add some users.
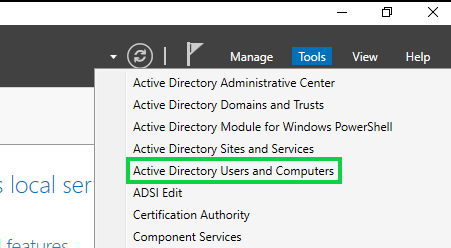
Back at the Server Manager Select Tools >> Active Directory Users and Computers
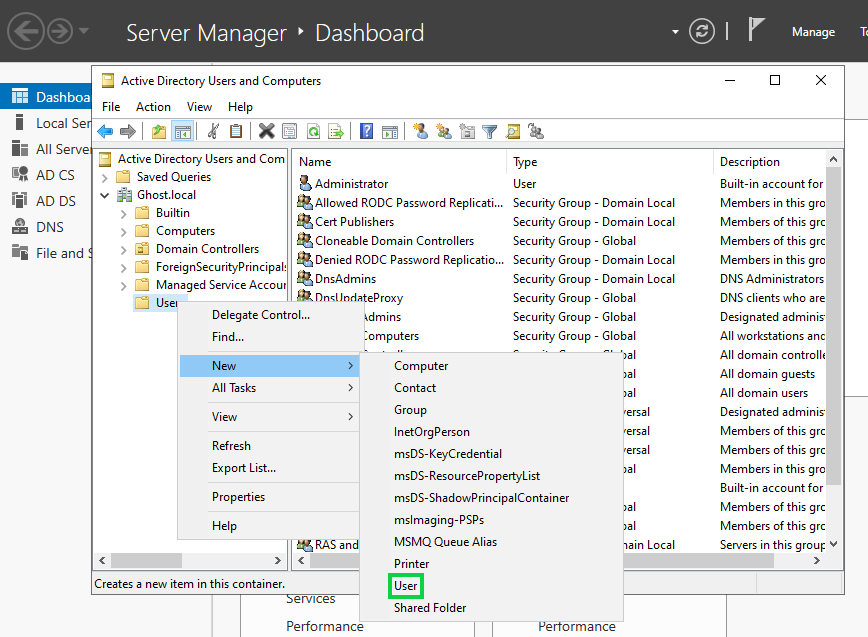
You'll then want to select your Domain Name (domain.local) >> Users, right click & select "New" >> User. We'll be creating two new users outside of our currently used Administrator account.
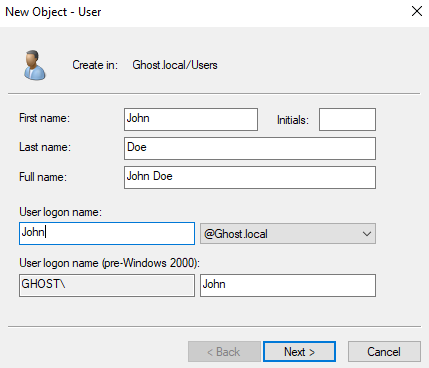
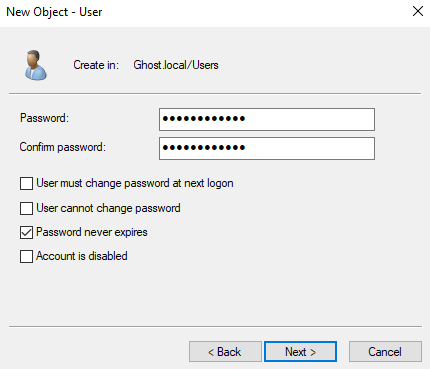
Since this is a project, I'm just going to set my password to never expire but use your own discretion when setting this up.
We'll do the same thing and make 2nd account called "Jane Doe". Once that's all set, we're going to go ahead and turn our Windows Defender Firewall off for all networks.
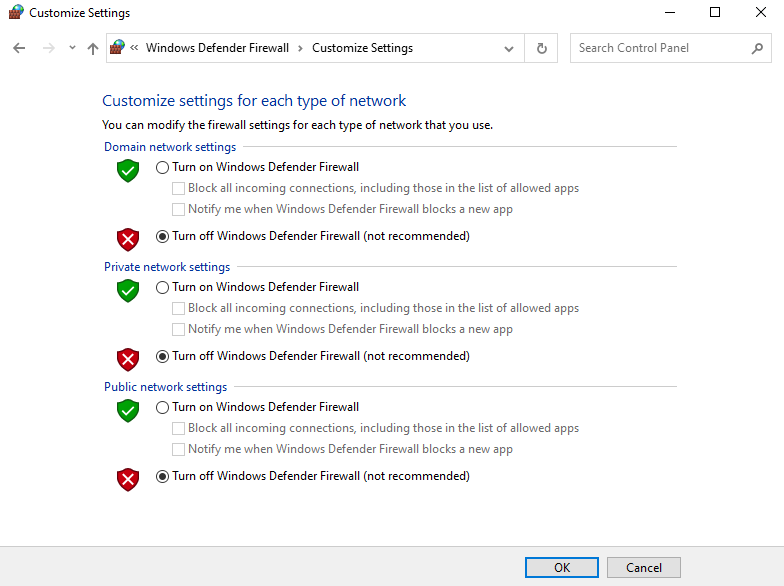
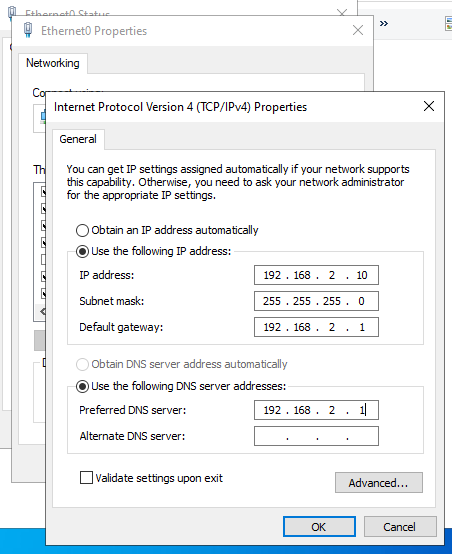
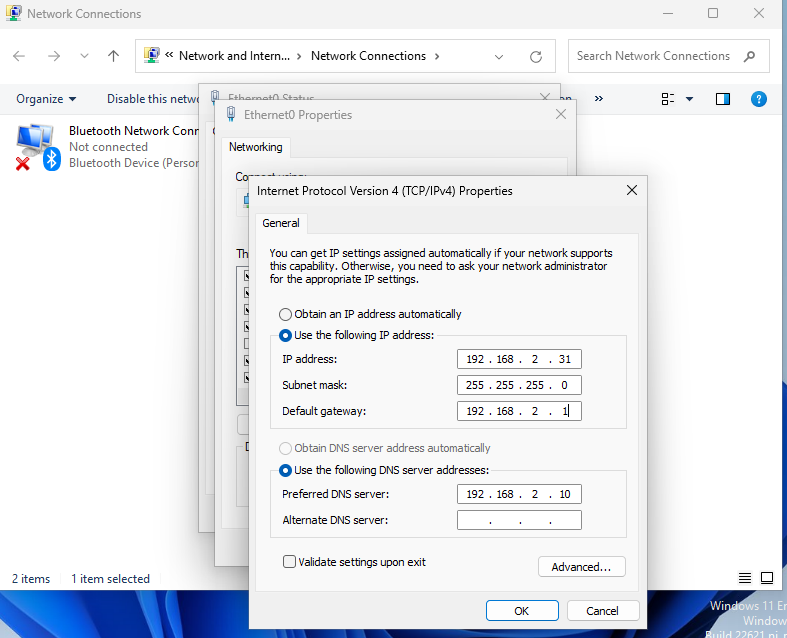
You'll then want to use pfsense as your default gateway for the Domain Controller. Navigate to your Control Panel >> Network and Internet >> Network and Sharing Center >> Change adapter settings.
You'll then want to go into your Ethernet properties >> TCP/IPv4 properties then input your pfsense networking information here as shown.
Configuring Windows 11 desktop & adding users to the AD domain
Our goal here is to add two Windows 11 Desktops to the domain and complete our active directory configuration. We'll do this to simulate both our users John and Jane Doe having their own work desktops.
We'll want to go ahead with the install using default VMware settings and skip using the product key. We're going to go ahead and name both our VMs after our two users.
Make sure to change the network adapter to VMnet3 and uncheck "Power on this virtual machine after creation".
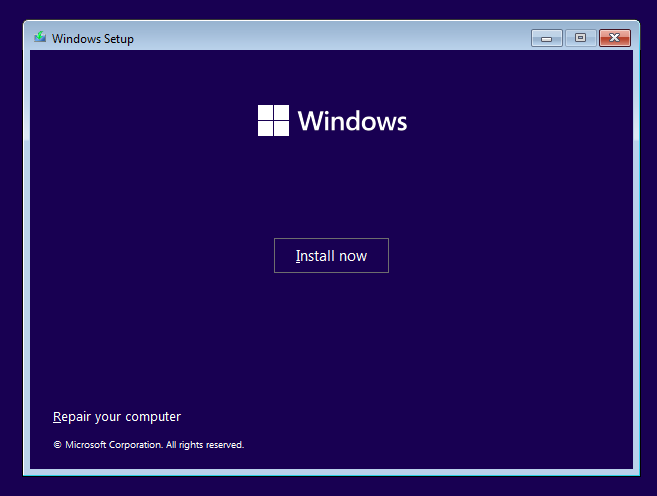
Now, you'll want to use the same settings you used for the domain controller when configuring your Windows 11 installation. You'll also want to turn off your internet for now on these two VMs.
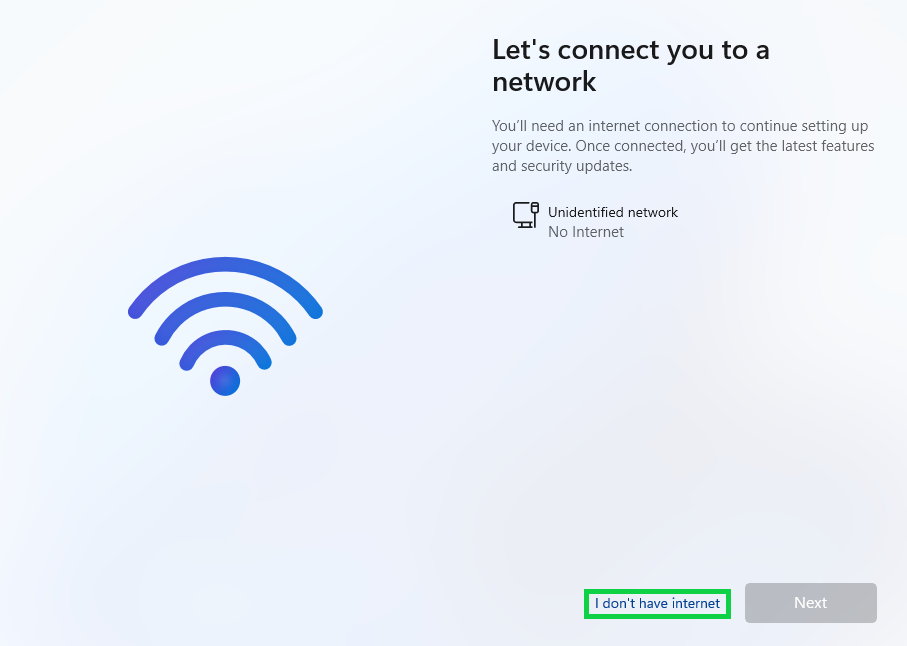
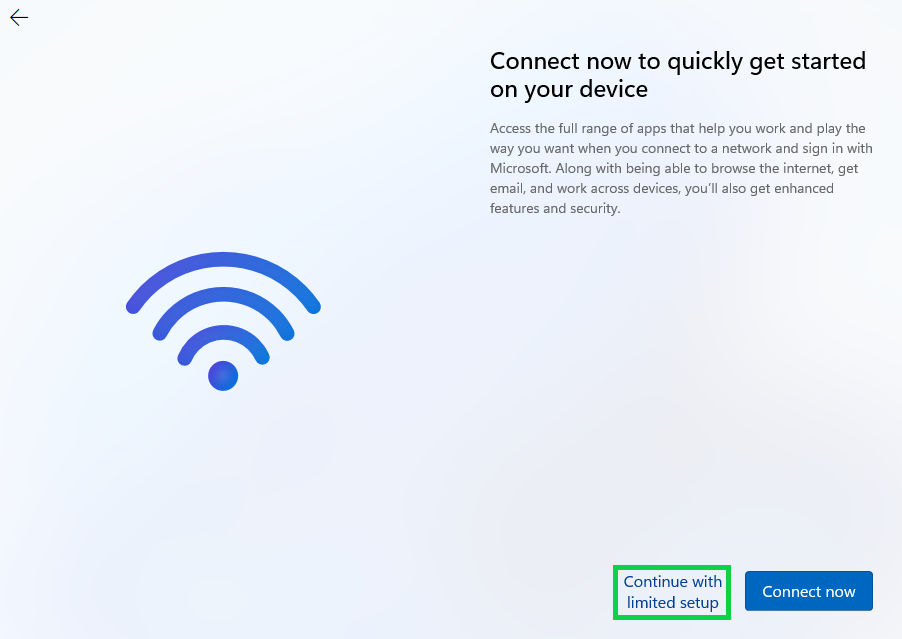
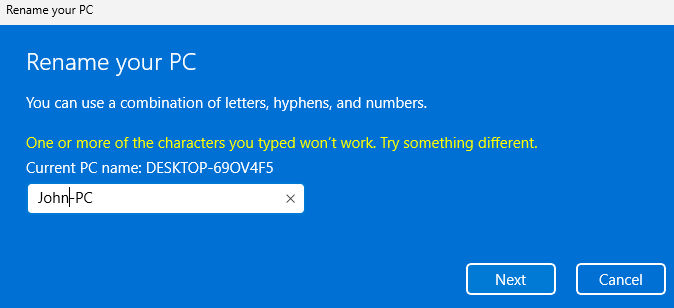
Lastly, You'll want to change your PC names for both accordingly to the designated users and restart them, just like with the domain controller.
Joining the PCs to the domain
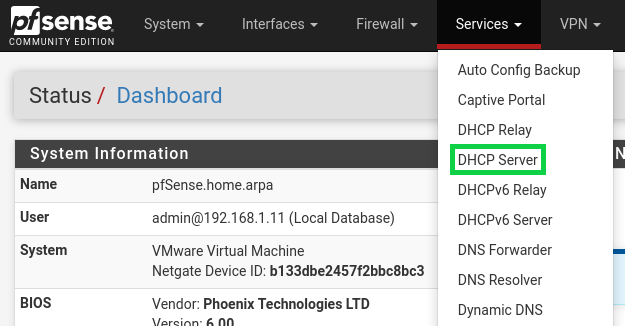
Now that we have our Windows installations in place, I'm going to go back into my pfsense VM and configure the DHCP Server on our Victum Network to include our Windows Server IPv4 address in the DNS server. You'll then want to add the domain name.
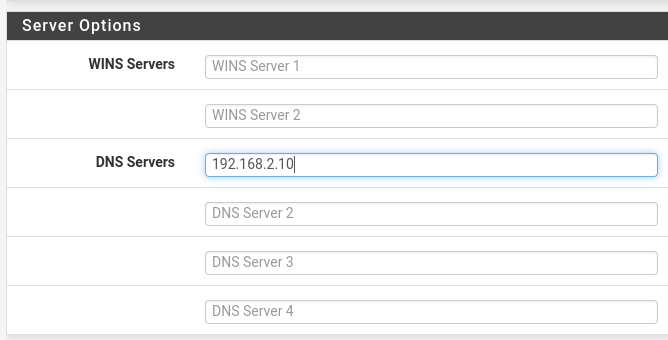

We'll want to navigate to our network DNS settings back in our first user VM and set our information there.
We'll now want to join our user VM to our domain controller. Search "domain" and select "Access work or school".


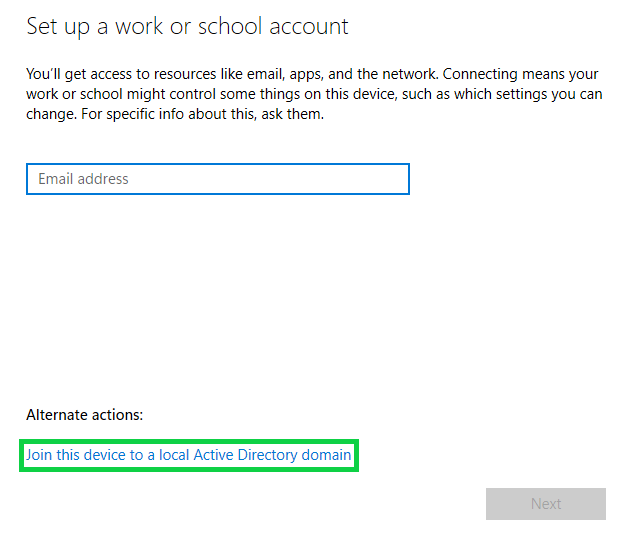

You'll want to enter the logins for the Domain Controller
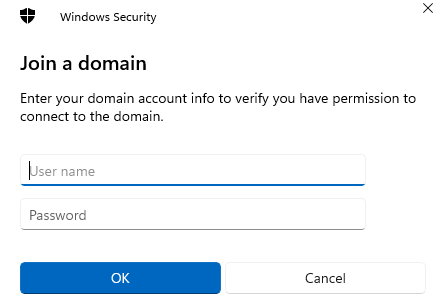
Once that's all done, restart your user VM then do the same thing for the 2nd user.
Installing Splunk on an Ubuntu Server
We'll be using a different Ubuntu ISO file (We'll be using Server this time instead of Desktop) we grabbed for our previous Ubuntu installation. We'll proceed to do another VM install using these settings:
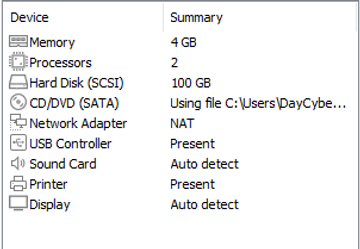
As we've done before, make sure to remove the CD/DVD drive with the file named autoinst.iso, as well as the floppy drive with the file autoinst.flp
You'll want to install the server using all the default settings and create a profile.

Installing an OpenSSH server is based on your preference but I recommend installing it. You can also add any services you want but it's not necessary for this lab.

During the installation, you'll be prompted to remove the CD(ISO) remove it and then reboot the VM.
After the VM has rebooted, your sign-in screen should look something similar to this.
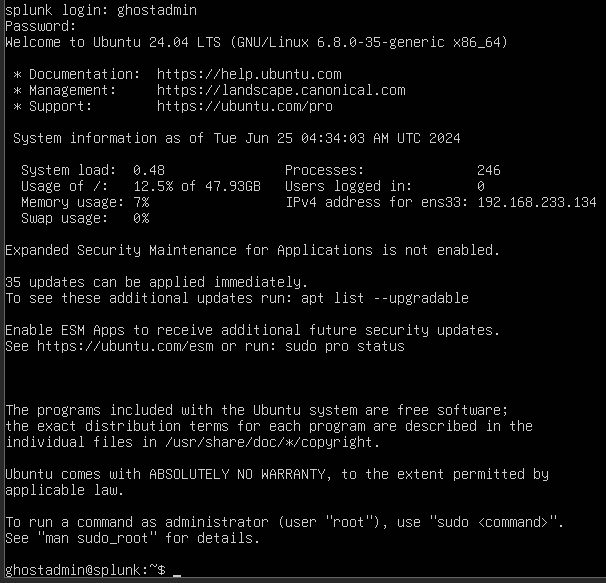
Now with the Splunk server, you can install with one of two options:
We'll be installing the GUI for the Splunk Ubuntu Server for ease of access. You'll want to run the following commands:
sudo apt install tasksel
sudo apt install ubuntu-desktop^
reboot
You'll then want to untar your Splunk Linux package they'll provide you if you sign up with them. This can differ depending on which product you purchase. I'll be using the standard Splunk Enterprise package which you can get here.
Once that's done, navigate to the ~/splunk/bin directory and use the ./splunk start to start the splunk instance.
Once you set your logins, go to http://splunk:8000 in your browser and log in.
Installing Universal Forwarder on Windows Server
In order to log the activities on endpoints, Splunk uses a mechanism called the universal forwarder. The universal forward can be installed on windows, Linux & macOS agents to forward logs to your Splunk instance.
Add a network Adapter of VMnet6 to your Splunk Ubuntu VM.
Navigate to Settings >> Forwarding and Receiving >> New Receiving Port

Enter port 9997 and save, then navigate to Settings >> Indexes >> New index
You'll then want to name the index “wineventlog” and save. We'll then go into our Windows Server VM and install our forwarder to it, which you can find here.
While installing, enter the IP address of your Splunk server and the default ports as prompted (8089 & 9997).
You'll then want to navigate back to your Splunk Instance >> Settings >> Add Data, then select "Forward".
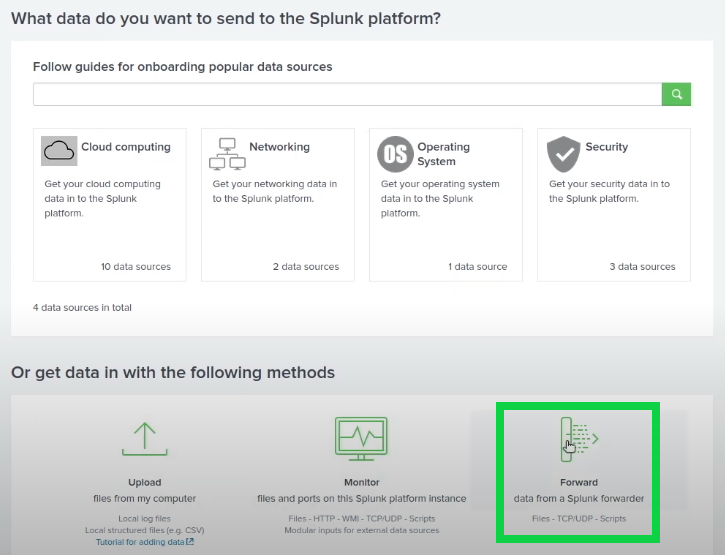
You'll then want to select the Domain Controller (Windows Server) >> enter a server class name e.g “Domain Controller” >> Next
Select local events logs and choose your desired event logs >> Next
Select “wineventlog” as the index >> Review >> Submit
That concludes our enterprise environment configuration with an emphasis in pentesting and security log reading. That should be everything needed to work on IDS/IPS detection rules, SIEM testing, rule tuning, and attack scenarios.